Grow lights had been around for decades although early on they were used mostly in commercial applications, i.e. in green houses. For a while now grow light bulbs are available for household use, mostly fluorescent but lately in LED as well.This is my second version of a shop-made grow light fixture, using a 24 watt T 5 fluorescent bulb. Commercial light fixtures are inexpensive and widely available at home centers and lighting stores but you know this is a woodworking blog, so I had to fashion my own and so can you. Please refer to the featured blog (upper right hand of this page) of an earlier version. Grow lights are a must in places where the household plants are not getting the exposure to sunlight, as in corners away from windows.
This time, as I had done in another project, I am using an old camera tripod as a stand for the fixture. The material as in the first version is from reclaimed white mahogany (see some nail holes visible).
I ripped a few thin strips of the material and, with the saw blade tilted to 60 degrees, made several pieces to make a hexagonal box. Although only three sides were needed (and glued) six pieces make the glue up process easier.
A hexagonal end cap strengthens the structure.
It is all glue so clamping looks complicated but it is really not.
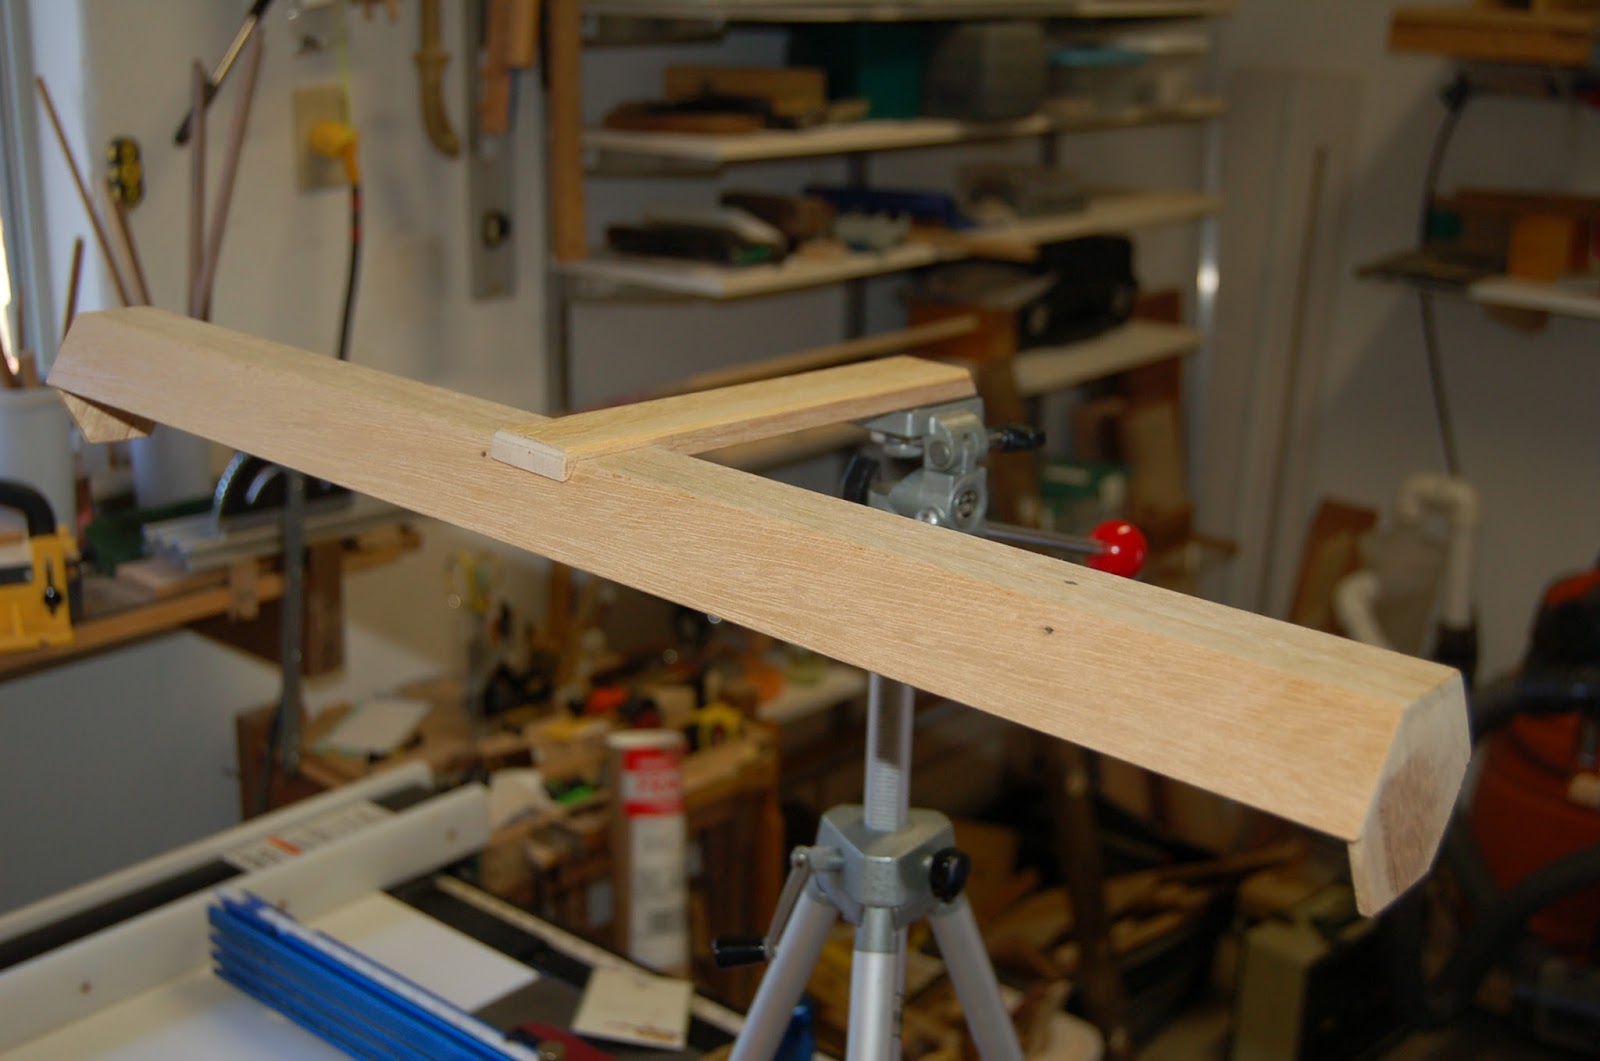
The fixture is made up of just two parts - the lamp holder and the cross bridge that will attach to the tripod. A 60 degree notch will ensure a good attachment between the lamp holder and the cross bridge.
A 1/4 inch washer is needed to attach the "bridge" to the tripod. It has to be recessed and the only best way to do it is to hand-cut the square hole with a chisel.
A 2-part epoxy will secure the washer to the square hole.
The next photos show how it will attach to the tripod.
The cross bridge is attached with glue to the lamp holder.
One coat of golden oak stain followed by three coats of polyurethane finishes the wooden parts.
The light bulb holder is held by a clasp (came with the ordered item) fastened to the inside of the lamp holder.
I try, as in most of my projects, to use the minimum amount of material for each project. Hardly would I add anything that does not add to the strength or functionality of the item. I like ornate decorations too but in my minimalist world if it does not contribute to the structure it is not necessary.
An otherwise dark corner becomes a brightly lighted nook for plants. This project can easily be a desk lamp; in fact, earlier I had used another camera tripod to fashion an LED desk lamp. Click the link below for that project:
http://easywoodworking-tolerba.blogspot.com/2015/10/led-desk-lamp-30.html