Welcome to Woodworks Made Easy

Practice any art, however well or badly, not to get money and fame, but to find out what's inside you.
--- Kurt Vonnegut

Pictures are meant to be self explanatory, and for visual clarity you may
click on each photo to enlarge. For older projects see Blog Archive. I don't specialize on a particular genre so there is quite a variety of projects for a number of different interests.

Even if you are not a woodworker but you like some or all of the projects, have your local crafts person make them for you from the ideas and photos you see here. For a particular project just click the specific title on the Blog Archive list (right side column below).

For anyone willing to learn or begin to do woodworking for the first time, please read first from the Blog Archive, "How and Where to Begin a Woodworking Hobby.

And it is not for men only. Read my note on "Women in Woodworking" from Blog Archive, April 2010.


click on each photo to enlarge


Friday, July 23, 2021

Tale of Two Bare Knives

I am not a knife maker but occasionally I will buy bare knives (blade only).  These ones are made in Sweden


The woodworking fun is about having these bare knives "dressed" to complete their personality, or simply make them look pretty, albeit with hand-me-downs of cut offs from previous projects.  It begins with digging from the scrap heap.


Puukko knives are made in Finland. I bought one in the early 80's long before Amazon or online buying.  Back then one would order from  glossy catalogues, often unsolicited but that they had a way into your mailbox. The one above was from Hackman Tapio Wirkala.  I don't think I paid much more than $20 for it.  It is a collectible now.  Check it out on ebay because every now and then  one may be on sale.  It would go from $220 to $300 depending on conditions.  

Puukko knives are distinctly unique in appearance but they became popular in the U.S. when American servicemen came back after WWII, regaled by how well  Finnish commandoes used them in many secret operations against the Nazis. The GI's brought some home and that is how it started to gain a foothold here among enthusiasts. Including the one above I own only one other.  Actually, the last one was given to me by a friend who used to travel to Finland.  

Puukko knives are known for their almost full length leather sheaths that run from the knife's point to its hilt. It is like a knife wearing wading boots.


But I digressed.

Now, the bare knives I just bought are from Sweden, as I mentioned earlier, so they are not Puukko knives. Just want to make sure I say that because I don't want any irate Finn to write me of their displeasure.  And I do have a handful of readers from Finland. But what I can do is make the knives look like Puukko.  I guess there will be no opposition there.  And I have to admit that if it is true that both countries used to be lands of the Vikings then the folks there must know a thing or two about sharp tools from axes to swords and knives.

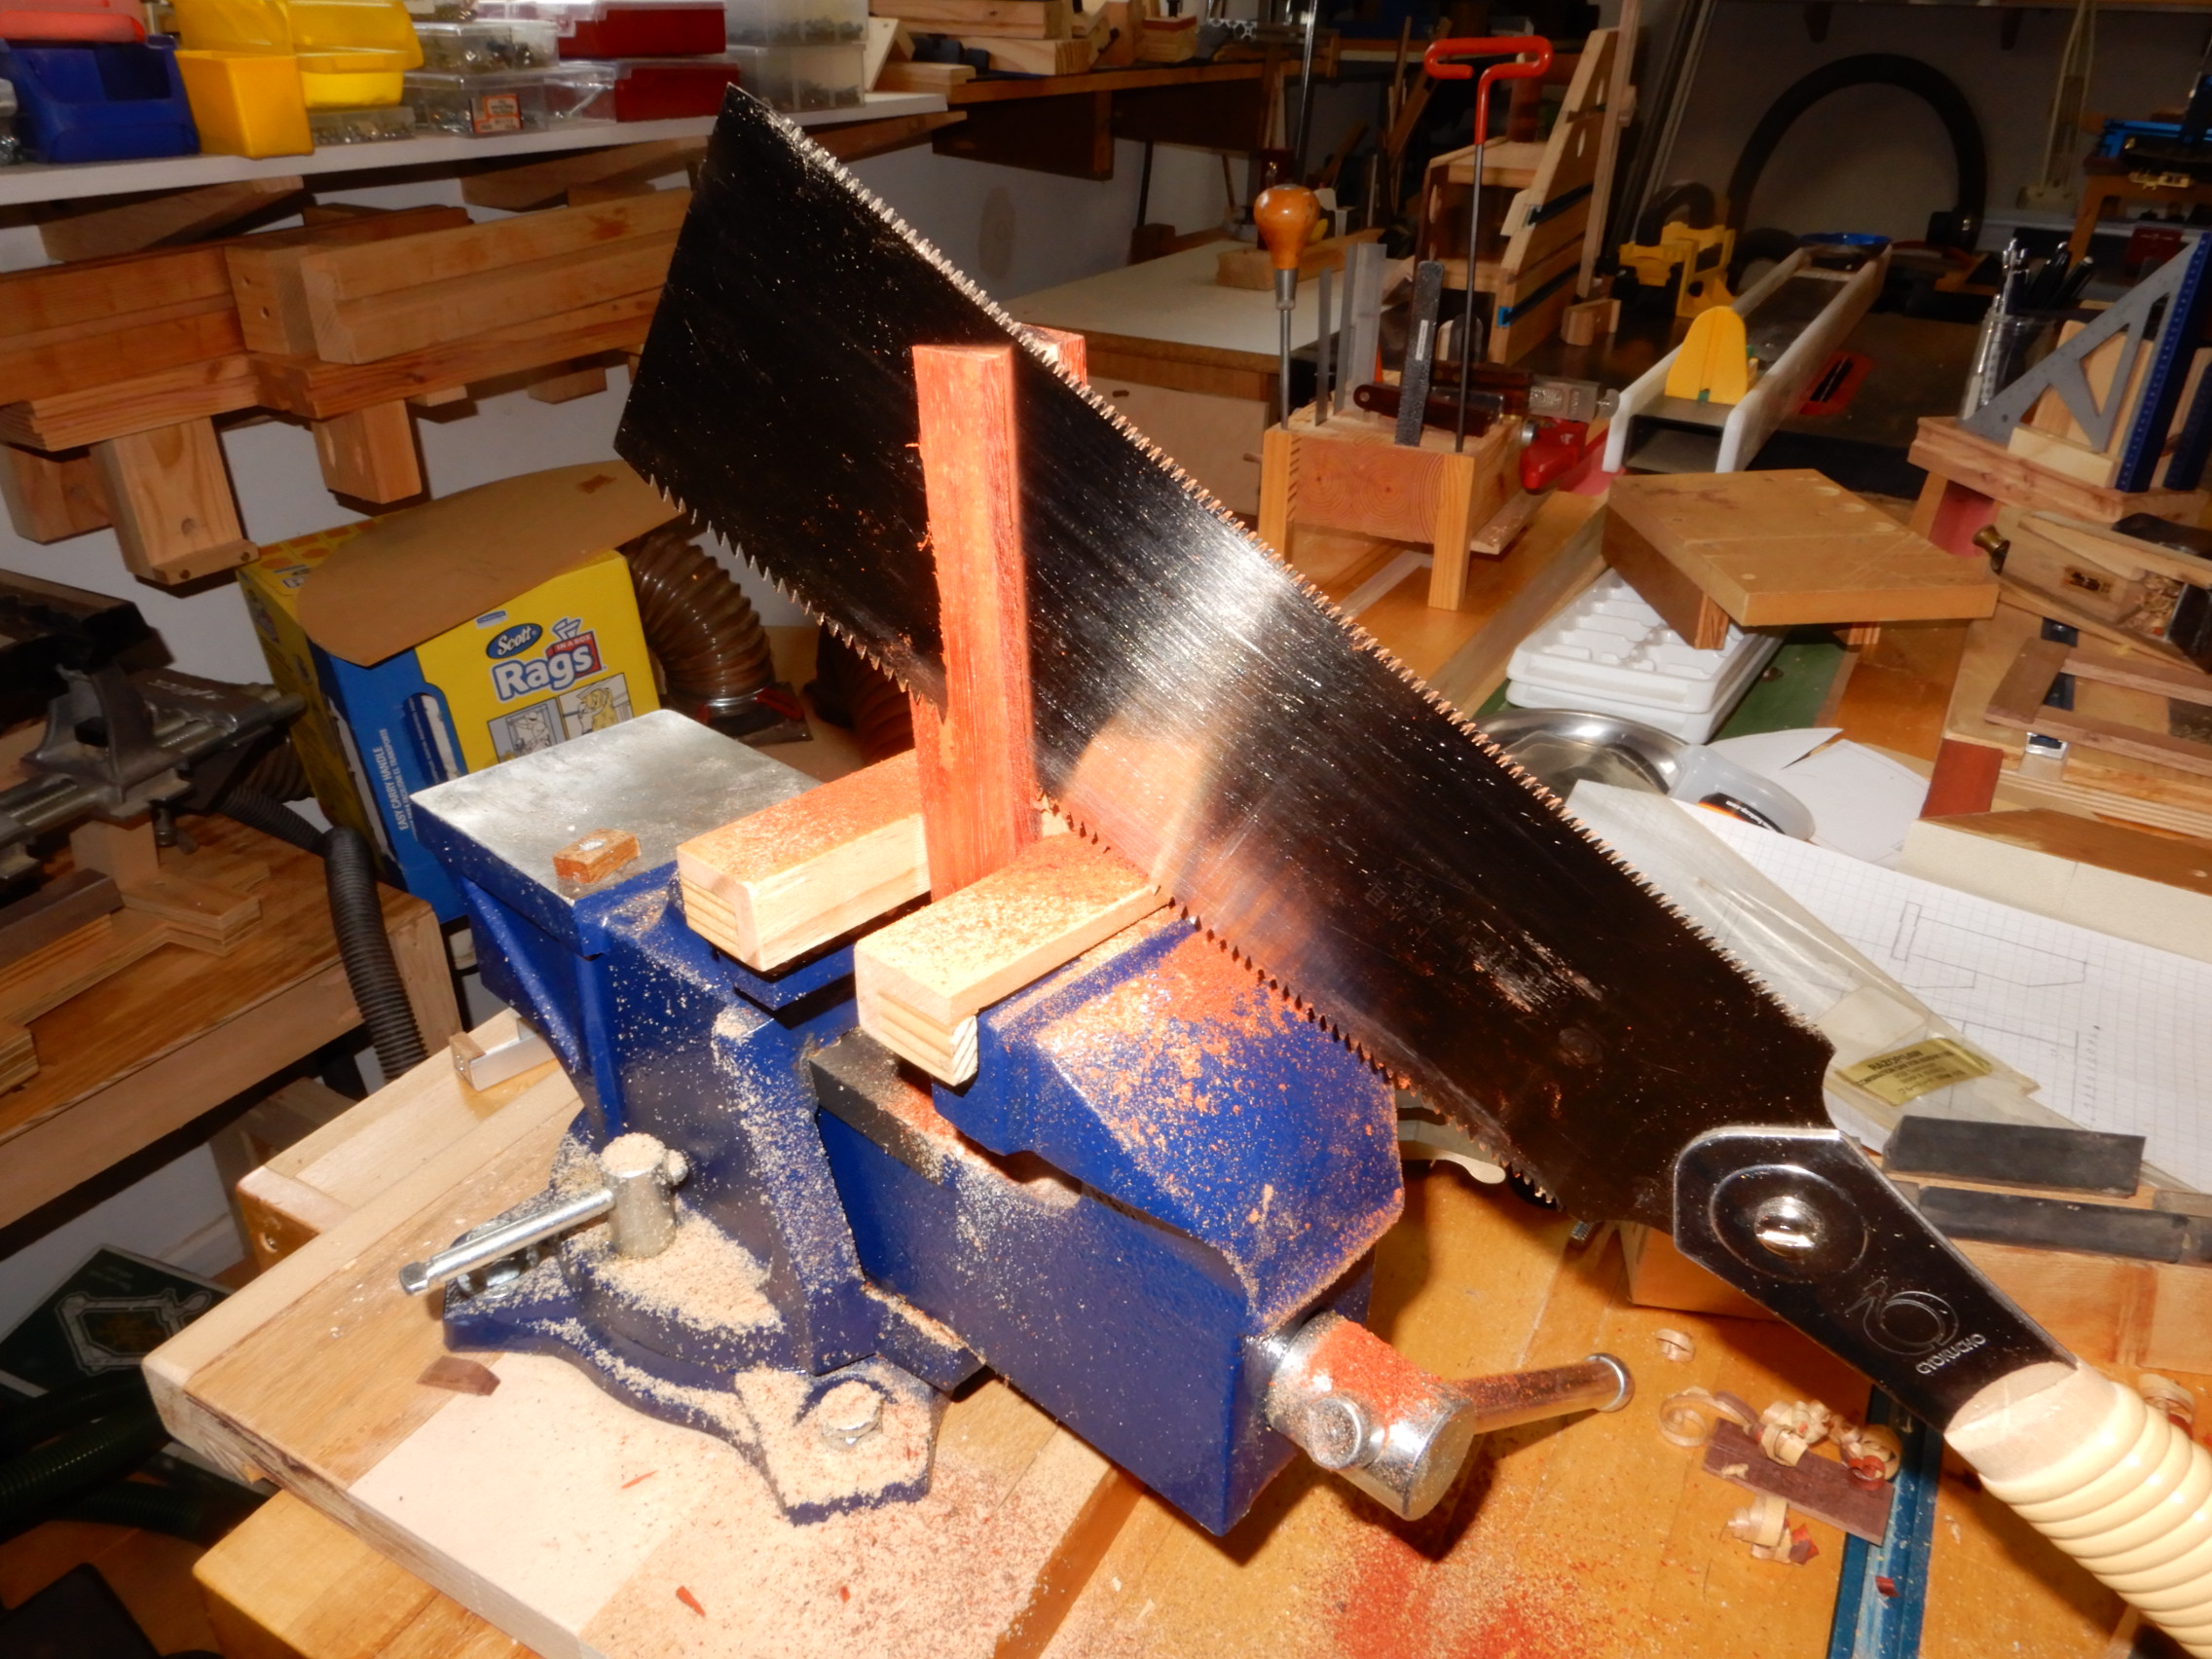
From the scrap heap were pieces of Padauk, small pieces of pau ferro, pink flame or ivory wood.  They were in small pieces to begin with because they are not cheap to acquire.


Knife handles are called scales in knife makers' speak.


One of the pleasures that can be derived from woodworking, perhaps just from my own point of view, is the swishing sound and the result it brings from a sharp hand plane cutting through flat wood.  The curly thin shavings are the only incontrovertible proof that a sharp plane iron (known to regular folks as "the blade") has done its job.


Clamps are the multitude of hands in my workshop that are my silent partners that have a total grip of the job and won't let go until I say it's time to loosen up.


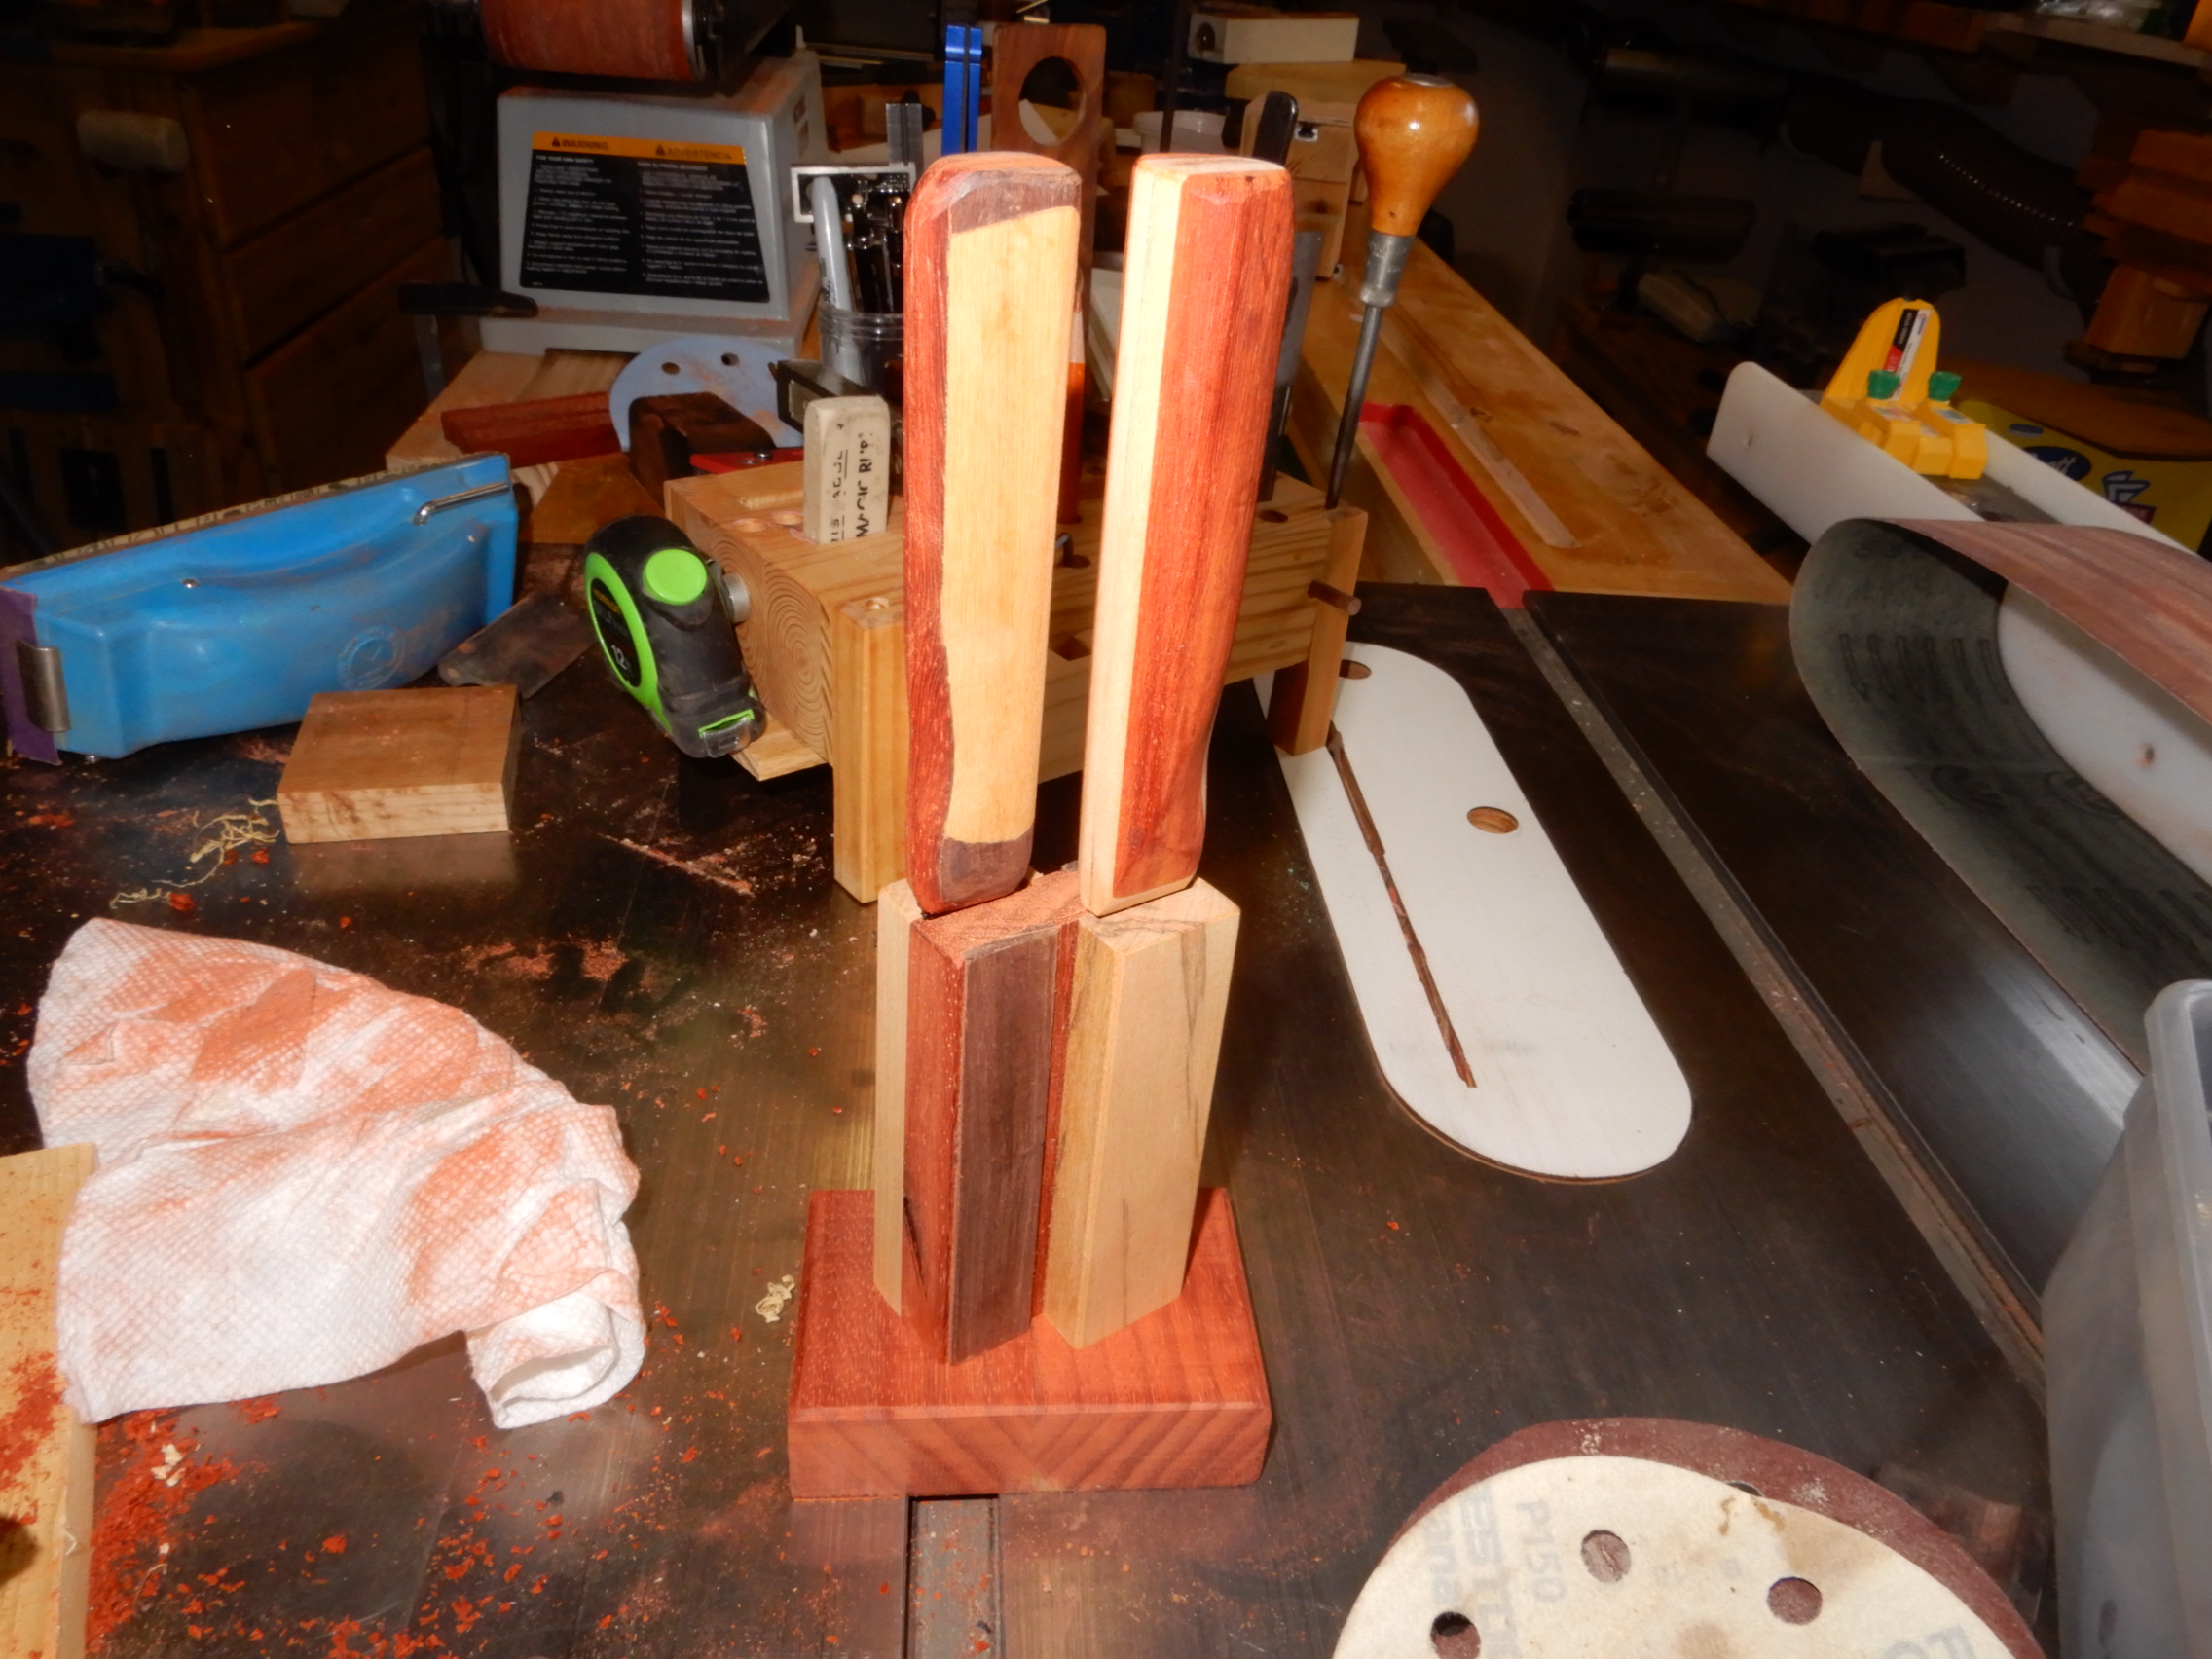
At the same time that I was making the scales I fashioned pieces to become the knife stand (middle in photo below)


For the knife handle I glued up several pieces together, then rip the whole piece in the middle to make up the two sides of the scales.  


From each split piece I traced the outline of the tang of the  blade.


Two strong double sided tapes joined both sides temporarily so I can shape the full handle before the permanent glue up.


With industrial epoxy I glued just one side of the tang to one of the scales.


Using epoxy again, with mixture of find sanding dust, I daub the tang around the groove. 


The point of "no-return" - final glue up.


I am always grateful to do woodworks in this day and age where materials are so readily available that make things easier for the hobbyists to "put things together", which crafts people did not have less than a century ago.  The 2-part epoxy, below, is one of those.  


Below is the almost finished knife stand.


The stationary belt sander did most of the initial shaping. Wood rasps, files, could have done the same thing.  In fact, for centuries, that's all the old world craftsmen relied on.

Below: First look before applying finish (Tung oil)


Assembling the stand


Fully dressed and on their pedestal, 


A couple of things: (a) The knives will sit on edge on a flat belly with the sharp blade facing down. (b) I customized these knives for my wife for when she slices tomatoes or small fruit on the cutting board in lieu of the paring knives she often uses, to my constant chagrin (paring knives are not designed to slice on cutting boards, I always say).  Therefore, I created that curve (green arrows), almost looking like a saddle straddling the handle before the blade.  It is for the thumb and index finger grip that  allows for a naturally downward yet ever so slight cutting pressure when slicing.  The knife will do the rest.


Wednesday, July 14, 2021

The Prototype

 It's a stool ..


It's a step ladder. 

How long does it take to switch the configuration?  Five seconds is ample time even if you are timidly slow in doing it.


Full disclosure - it is a prototype only to me because I saw a photo of it from an online store.  I thought it would be a nice challenge to make one. Added to the degree of difficulty is that there were no detailed measurements except for the general height, width and depth.  For a minute, but not one second longer, I thought, "why not just order one"? $90 plus sales tax and shipping.  Nah, that would have been far too easy. And where's the fun in that.

I started with a drawn-to-scale sketch.  Key was to figure out the pivot point of the two steps as to not be encumbered by the rest of the frame.  Based on the photo I tried to configure it by just guessing the layout and from how well the dimension would fit my own personal height and reach.


Our next door neighbor who did a home renovations recently gave me some of the utility shelves they no longer needed.  Some of you who read the previous blog must be wondering, "Is this the same neighbor who gave  their round green marble table top?" The same. If you think we must have such nice neighbors, you are thinking right.  And it's a great neighborhood, too.

Why is this a prototype?  Well, I wanted to see first if I can make it work before using any of my stash of premium wood (have you looked at the price of lumber lately?).  The pine utility shelving is the perfect material for such a trial.  The plan is to make the prototype from which a pattern can be established, the experience in making it shall be the model for how to do it on hardwood later.

So, the creativity on my part here is from improvisation - as a musician would improvise on an existing composition.


It took almost a couple of the shelves to make several long boards ripped on the table saw.  The rails which are the short cross members connecting the legs were mitered to 5 degrees to make the A-frame.

To make quick work of the joinery I opted for pocket screws.  If and when I do decide to make it out of hardwood later, I will definitely use one of the traditional joineries.  Not that there's anything wrong with pocket-hole joinery.  In fact pocket hole joinery is quite strong, given the right circumstances. But aesthetically, it has its downside.


Always checking for fit nd alignment every step of the way.


Below is a key step.  I drilled a quarter inch hole to act as a pivot point to test the rotation of the steps.  I had to make sure there was ample clearance.  It was going to be a trial and error but once was all it took.  Hurray!


After drilling the holes on the legs and the two-step assembly for the connecting rod, a check for fit was needed. 


The frame and step ladder assembly are done.  Another test. And another ..


At last the seat and the two steps were fashioned and attached.


More tests.


One other key element are the spacers (my own idea) along the connecting rod to ensure the step ladder assembly stays centered between the frame legs of the stool.


Beore all the parts were put together ..


Strips of rubber lining on all the feet that make contact with floor were attached with contact cement.  A "drawer handle" attached to the bottom rail of the step ladder assembly makes for easy movement when switching configuration.


Concurrently while working on this project I was also refinishing the outside part of our front door.  When it got too hot outside - scraping and brushing the old finish - I'd switch to the workshop (with AC 😍👍) to work on this. I used a commercial step ladder outside so I thought I'd make a comparison.  The prototype clearly has a smaller footprint but the commercial one folds.  But it is heavier, it even has wheels on the back legs for easy movement.  The prototype gets picked up and carried with one hand on the side.


I originally intended for this prototype to be exactly just that, a model.  Now, I think I can and will fully use it in the shop, as is.  It will be a stool to sit on mostly but I have shelves where some of the stored stuff, including some tools, that will need a step ladder to retrieve them.  This will come in handy.  It turned out surprisingly, deceptively sturdy and stable.  Keep in mind, it will deal only with static load that is on the two steps and perhaps on the seat of the stool. The steps are double plied - surface steps on top of two other boards.  The solid round connecting rod is 1-1/4 inch in diameter. And there are essentially six contact points between the legs and the floor. 

Come to think of it it will also look good as a stepped planter for household plants.  Just saying 😉.