I am not a knife maker but occasionally I will buy bare knives (blade only). These ones are made in Sweden
The woodworking fun is about having these bare knives "dressed" to complete their personality, or simply make them look pretty, albeit with hand-me-downs of cut offs from previous projects. It begins with digging from the scrap heap.
Puukko knives are made in Finland. I bought one in the early 80's long before Amazon or online buying. Back then one would order from glossy catalogues, often unsolicited but that they had a way into your mailbox. The one above was from Hackman Tapio Wirkala. I don't think I paid much more than $20 for it. It is a collectible now. Check it out on ebay because every now and then one may be on sale. It would go from $220 to $300 depending on conditions.
Puukko knives are distinctly unique in appearance but they became popular in the U.S. when American servicemen came back after WWII, regaled by how well Finnish commandoes used them in many secret operations against the Nazis. The GI's brought some home and that is how it started to gain a foothold here among enthusiasts. Including the one above I own only one other. Actually, the last one was given to me by a friend who used to travel to Finland.
Puukko knives are known for their almost full length leather sheaths that run from the knife's point to its hilt. It is like a knife wearing wading boots.
But I digressed.
Now, the bare knives I just bought are from Sweden, as I mentioned earlier, so they are not Puukko knives. Just want to make sure I say that because I don't want any irate Finn to write me of their displeasure. And I do have a handful of readers from Finland. But what I can do is make the knives look like Puukko. I guess there will be no opposition there. And I have to admit that if it is true that both countries used to be lands of the Vikings then the folks there must know a thing or two about sharp tools from axes to swords and knives.
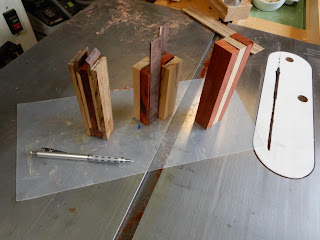
From the scrap heap were pieces of Padauk, small pieces of pau ferro, pink flame or ivory wood. They were in small pieces to begin with because they are not cheap to acquire.
Knife handles are called scales in knife makers' speak.
One of the pleasures that can be derived from woodworking, perhaps just from my own point of view, is the swishing sound and the result it brings from a sharp hand plane cutting through flat wood. The curly thin shavings are the only incontrovertible proof that a sharp plane iron (known to regular folks as "the blade") has done its job.
Clamps are the multitude of hands in my workshop that are my silent partners that have a total grip of the job and won't let go until I say it's time to loosen up.
At the same time that I was making the scales I fashioned pieces to become the knife stand (middle in photo below)
From each split piece I traced the outline of the tang of the blade.
Two strong double sided tapes joined both sides temporarily so I can shape the full handle before the permanent glue up.
With industrial epoxy I glued just one side of the tang to one of the scales.
Using epoxy again, with mixture of find sanding dust, I daub the tang around the groove.
The point of "no-return" - final glue up.
I am always grateful to do woodworks in this day and age where materials are so readily available that make things easier for the hobbyists to "put things together", which crafts people did not have less than a century ago. The 2-part epoxy, below, is one of those.
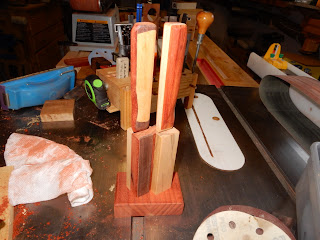
Below is the almost finished knife stand.
The stationary belt sander did most of the initial shaping. Wood rasps, files, could have done the same thing. In fact, for centuries, that's all the old world craftsmen relied on.
Below: First look before applying finish (Tung oil)
A couple of things: (a) The knives will sit on edge on a flat belly with the sharp blade facing down. (b) I customized these knives for my wife for when she slices tomatoes or small fruit on the cutting board in lieu of the paring knives she often uses, to my constant chagrin (paring knives are not designed to slice on cutting boards, I always say). Therefore, I created that curve (green arrows), almost looking like a saddle straddling the handle before the blade. It is for the thumb and index finger grip that allows for a naturally downward yet ever so slight cutting pressure when slicing. The knife will do the rest.


No comments:
Post a Comment