I'm going to toot my horn a little bit here. Over the years I had six woodworking tips published by Woodsmith Magazine but this is the first time I got a whole page. I'm glad I'm able to give back just a little bit to many countless woodworkers worldwide from whom I've learned from tips and techniques that they willingly and selflessly shared with others.
It is true that power tools have considerably made woodworking easier to practice and get results far more quickly. However, there is nothing more challenging but yet very rewarding than in the use of hand tools. And whenever and wherever hand tools are used to cut, shave, shape and finish, every one of those tools is only as good as how well it is kept sharp, to be effective, useful and, more importantly - safe to use. A well sharpened moderately priced, even cheap tool, will outperform a dull or poorly sharpened "top-of-the-line" expensive tool.
And there is nothing more critical to sharpening than to have the proper sharpener; and knowing how to use it, of course.
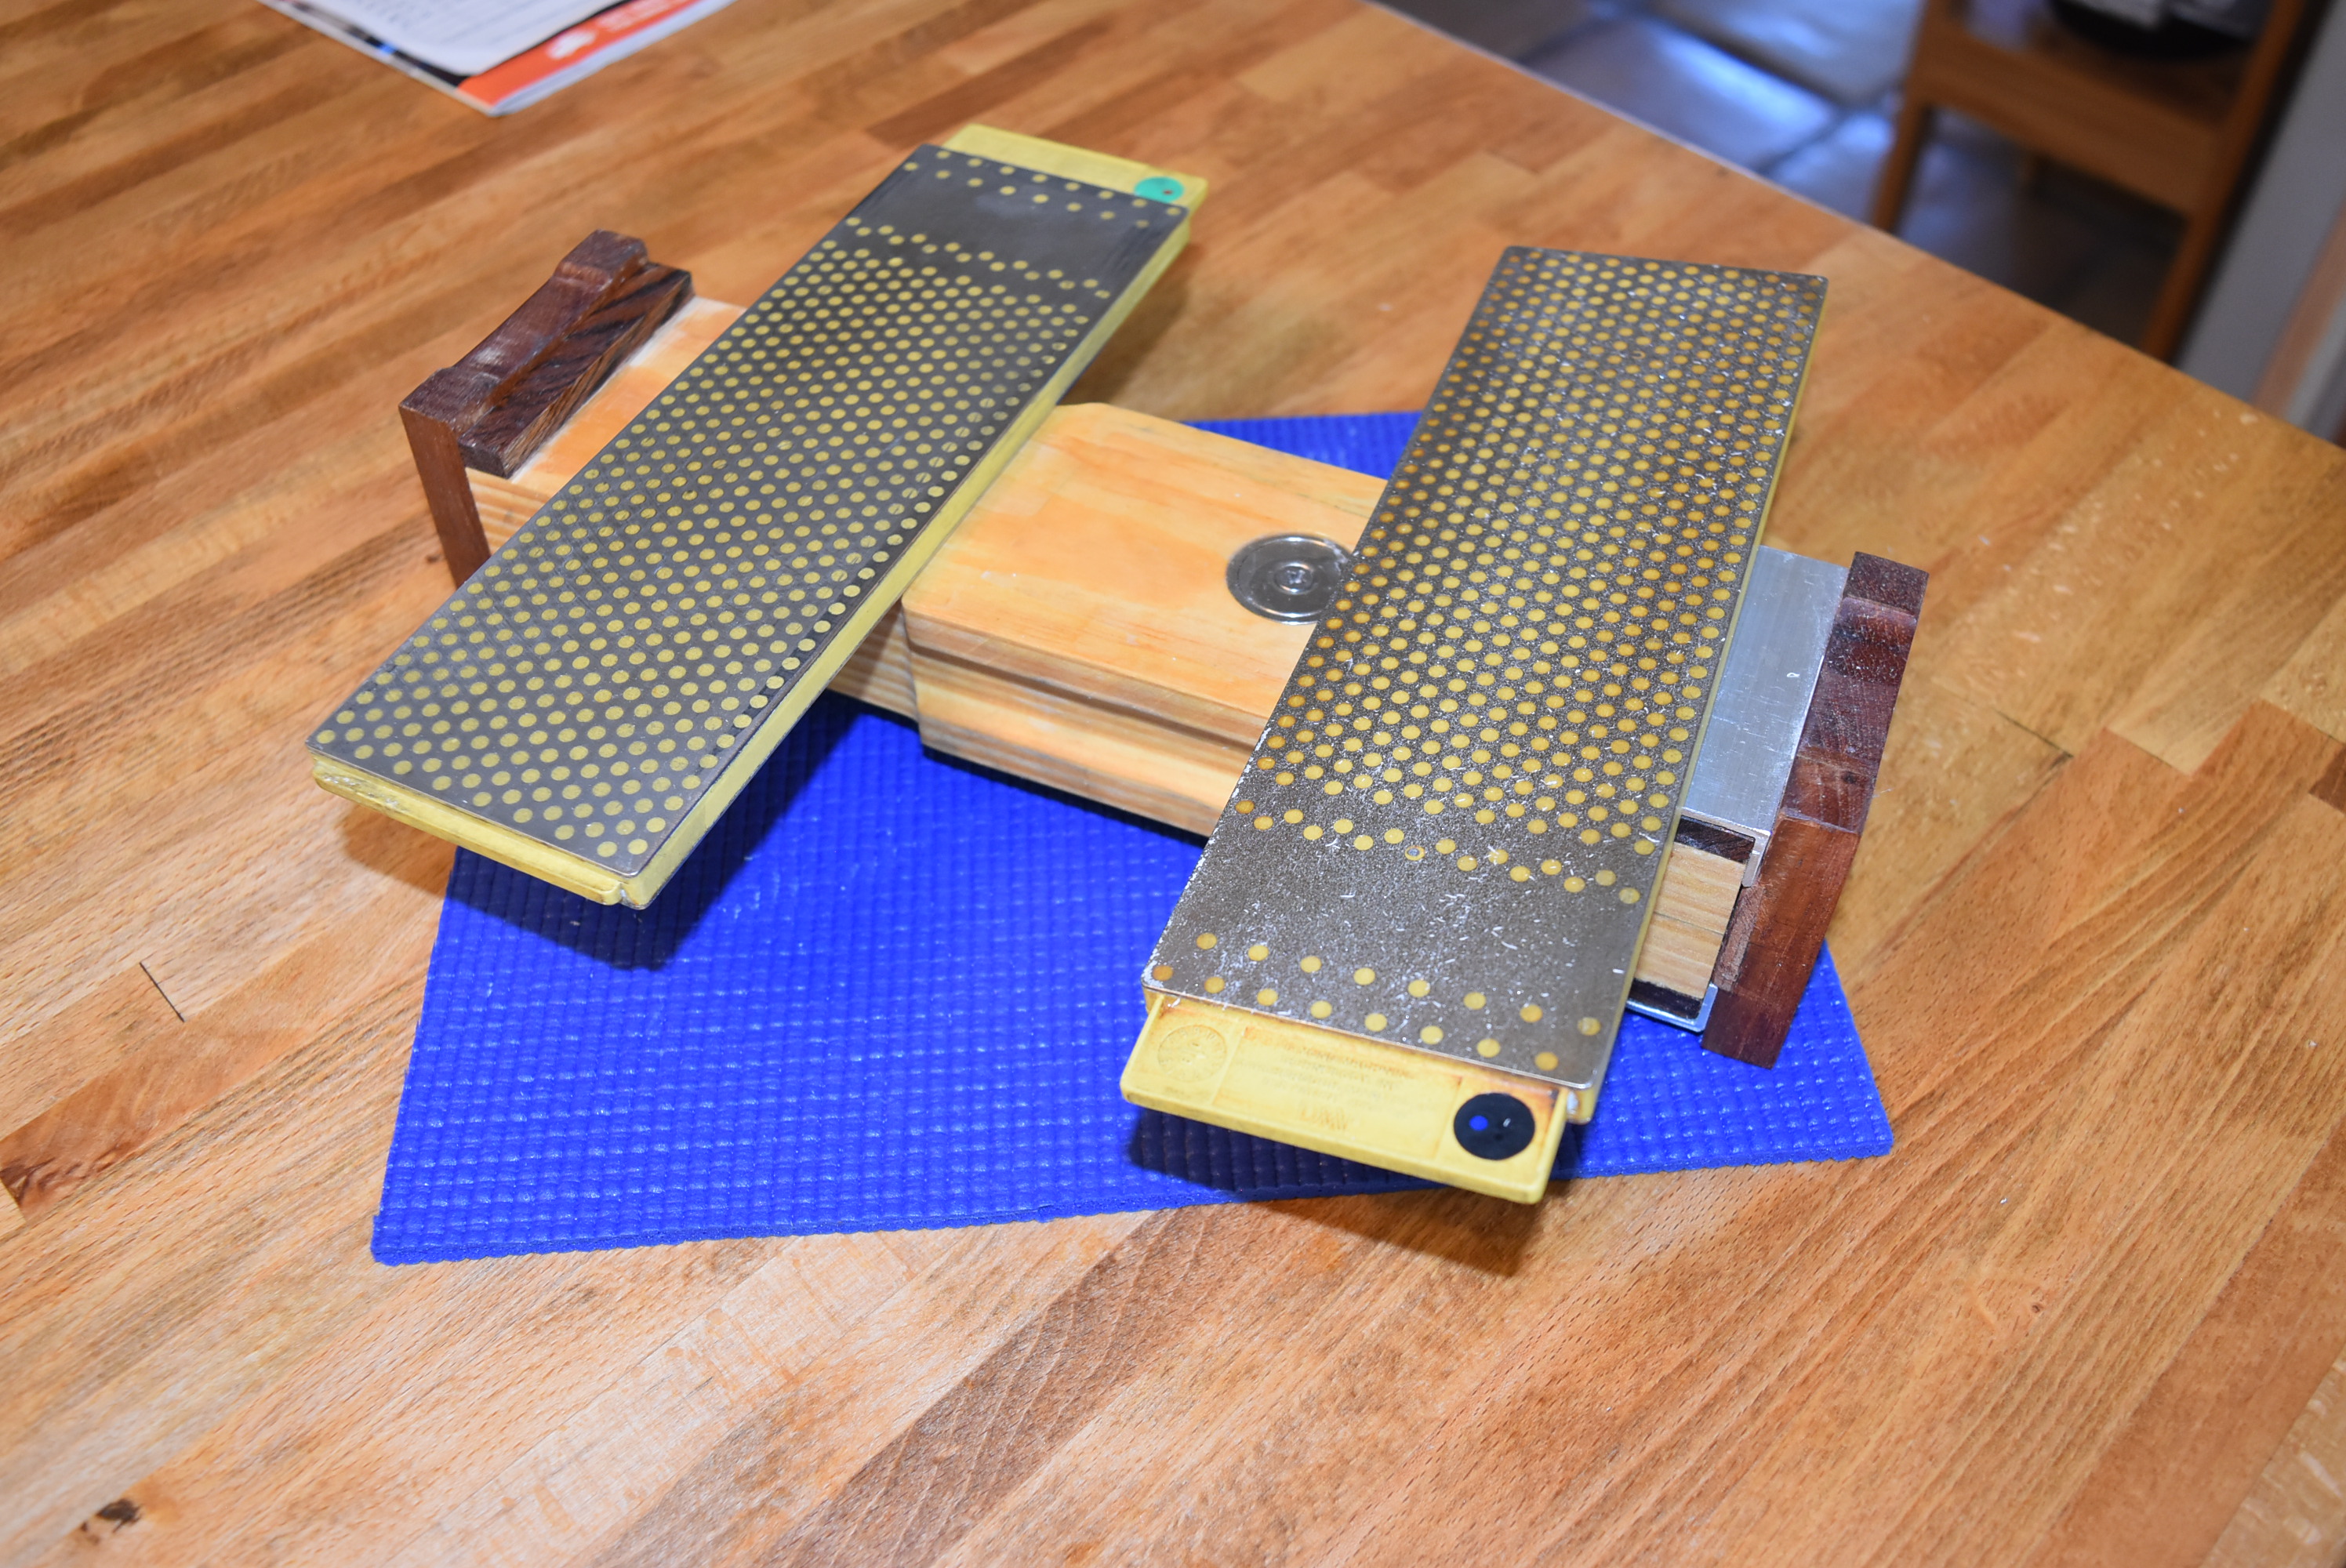
The added bonus is that the rest of the household tools in the kitchen, garden and for other hobbies get the benefit from the woodworker who has the passion and patience to sharpen and hone them. Now, I had mentioned that I rather have a small workshop, only about 300 square feet, so I must utilize every square area of space. This tip is about having four sharpening surfaces occupy a mere 33 square inches of footprint but readily accessible and requiring little effort to get them into action with as little fuss as possible.
Woodsmith Magazine editors always make their own version of the readers' tips to establish dimensions and the construction process. Here, they pretty much did how I did mine, so I offer below a detail of the pieces before I assembled my version.

If the reader happens to subscribe to the magazine, this is the issue, page 7, where my tip is located.
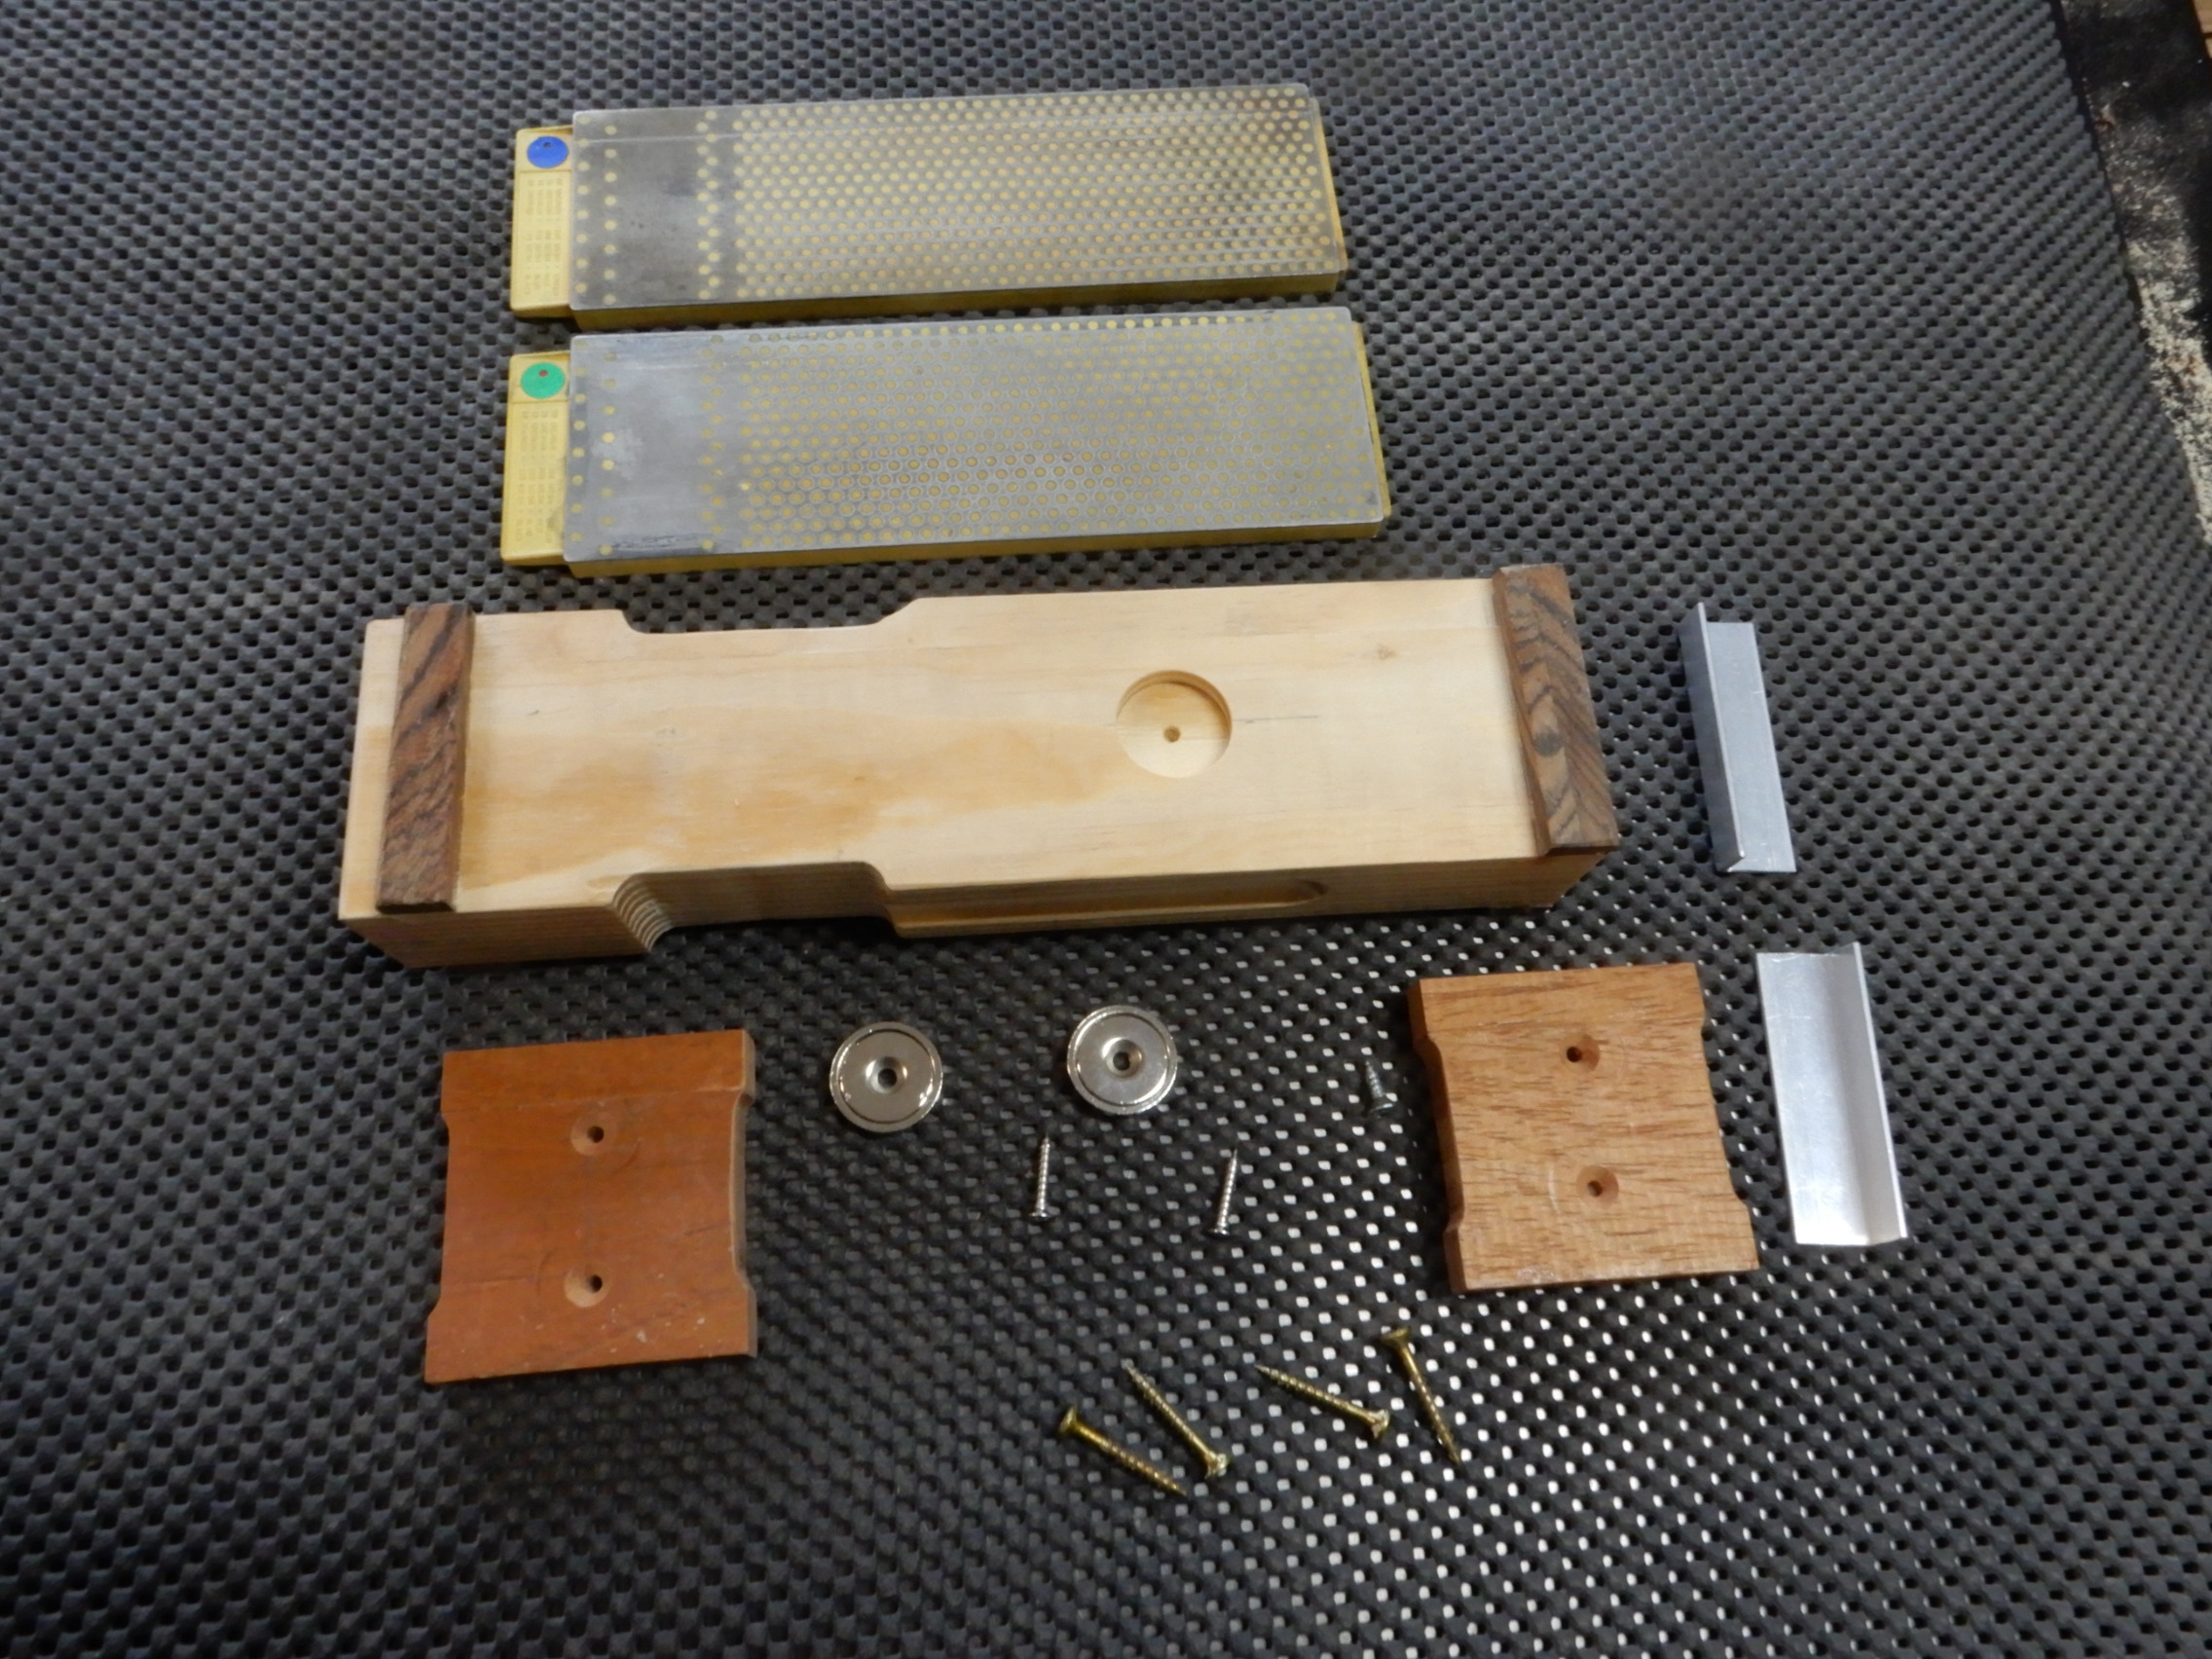
I have two diamond double-sided sharpeners with two surfaces each for a total of four different faces - coarse, medium coarse, fine and extra fine. (a) main base, two end caps that serve as stands, two aluminum angles, two rare earth magnets and screws.
Once assembled, two surfaces are readily available where one flip of the whole assembly exposes two different surfaces. Top and bottom sides of each sharpener can be exposed by flipping it over by overcoming the grip of the magnet.
The rare earth magnet is really strong but lifting the sharpener from one end opposite where the aluminum anchor is located, will easily overcome it.
Tip: Use a glass cleaning liquid as lubricant during the sharpening process, a lot less messy than oil and certainly better than plain water.
Tip: Below is the more familiar butcher's sharpener. It works just as well, but only for meat and fish knives; clearly not for woodworking tools.
And, of course, there are a lot of commercially available flat diamond pocket and tapered rod sharpeners, which perform very well. But again, for kitchen tools mostly.
The other more economical way, but just as effective, are aluminum oxide impregnated PSA (pressure sensitive adhesive) sharpening films that can be cut to size and "pasted" over flat glass or polycarbonate material (Lexan, for one).
Many years ago at an affordable price (then), I purchased a flat, really flat, granite block where one may use PSA sharpening films or adhesive-backed sand paper for sharpening as an alternative surface.
Each block came with a certificate for flatness and a serial number.
Back then, it went for about $20, now for $60; but I won't recommend it now because there are alternatives, i.e. polycarbonate sheets that can be cut on the table saw to the desired size. For a "wow or OMG" piece of granite, Starrett - a tool maker - sells one for $1429.33 plus shipping. I may be a bit obsessive about sharpening but I and probably no one else can be that insanely obsessive. I'm just saying.
But hey, remember, keep those tools sharp. Whether you're a woodworker or a kitchen wizard, your tools are only as good up to but no less than its optimum level of "SHARP".
Lastly, sharpening is, of and by itself, an art that can be learned easily by anyone, and I mean anyone, willing and has the patience to do it. I preached every chance I get to those of a certain age like me the benefit of hand eye coordination under very comfortable locations like the kitchen. Hand eye coordination has the added benefits, if not crucially so, by the time we get to the second half of our lives, critically so during the final quarter. You are keeping your mind sharp as well as that crown jewel of a cutting implement.