Welcome to Woodworks Made Easy

Practice any art, however well or badly, not to get money and fame, but to find out what's inside you.
--- Kurt Vonnegut

Pictures are meant to be self explanatory, and for visual clarity you may
click on each photo to enlarge. For older projects see Blog Archive. I don't specialize on a particular genre so there is quite a variety of projects for a number of different interests.

Even if you are not a woodworker but you like some or all of the projects, have your local crafts person make them for you from the ideas and photos you see here. For a particular project just click the specific title on the Blog Archive list (right side column below).

For anyone willing to learn or begin to do woodworking for the first time, please read first from the Blog Archive, "How and Where to Begin a Woodworking Hobby.

And it is not for men only. Read my note on "Women in Woodworking" from Blog Archive, April 2010.


click on each photo to enlarge


Sunday, March 3, 2019

Minimalist Plant Stands

I keep repeating to anyone who would listen that woodworking is not as hard as anyone may think. In fact, no better time than now to be imagining doing it because of the advancement in technology, better tools and more reference materials than ever before, such as this blog, that encourages the reader to take the plunge if he or she hasn't already. 

It used to be that woodworking required a lot of craftsmanship skills to do a decent job. The things the average woodworker can do now was not as easily achievable as, say, 20 to 30 years ago. Now, imagine the skills needed in the 15th to 19th centuries ago. Today, as in this example, I used only one power tool - the table saw (you need a table saw even as a beginner anyhow), just three different saw blades, clamps, glue and some inexpensive indexing plastic-based gizmos to do it. One tool, patience and time to turn (first photo) these seemingly straight pieces of scrap material.


Into:


You will see towards the end the previous plant stands I did had several times the amount of material used, massively much more, than these latest versions. The challenge was to do this project with the least possible amount of material.


For the top rings I used 3/4 inch plywood with one side (visible externally once finished) laminated with solid oak. Why plywood, besides the fact that they were conveniently available from the scrap heap? Plywood is actually more stable when it comes to resisting warping sue to changes in humidity and temperature, and they're more economical too.


Glue up of the lamination to one edge of the plywood base


The hexagonal rings required cutting 60 degrees miter on each edge.

The table saw's adjustable miter fence made easy work of the 60 degree miter cuts.


For the legs soled oak boards were the right material


The two gizmos shown below makes quick accurate, unparalleled precision cuts of the joinery. These cuts a century ago would have taken hours of painstaking labor by a highly skilled craftsman. These commercially available tools ($30) will index the cuts as routinely as pushing the work pieces on the table saw top.


Band clamps make easy work of clamping the pieces until the glue sets.

The subtle taper on the legs were all done on the table saw.


This shop made jig, below, makes possible cutting on the table saw repeatable slots on each corner of the hexagon that will be fitted with 1/4 inch hardwood  (glued and clamped) for the needed additional strength of the joints.


Note the slot created at the corners


Dry fitting the parts. Note the walnut wedge inserted at the corners, excess sawed off later

Final sanding and notice the subtle taper on the legs. Impossible years ago these tapers were done at the table saw.


Over the years of building and learning, I've evolved construction techniques from using a lot of material to only using the bare minimum, without sacrificing strength, usefulness and a little bit of elegance.
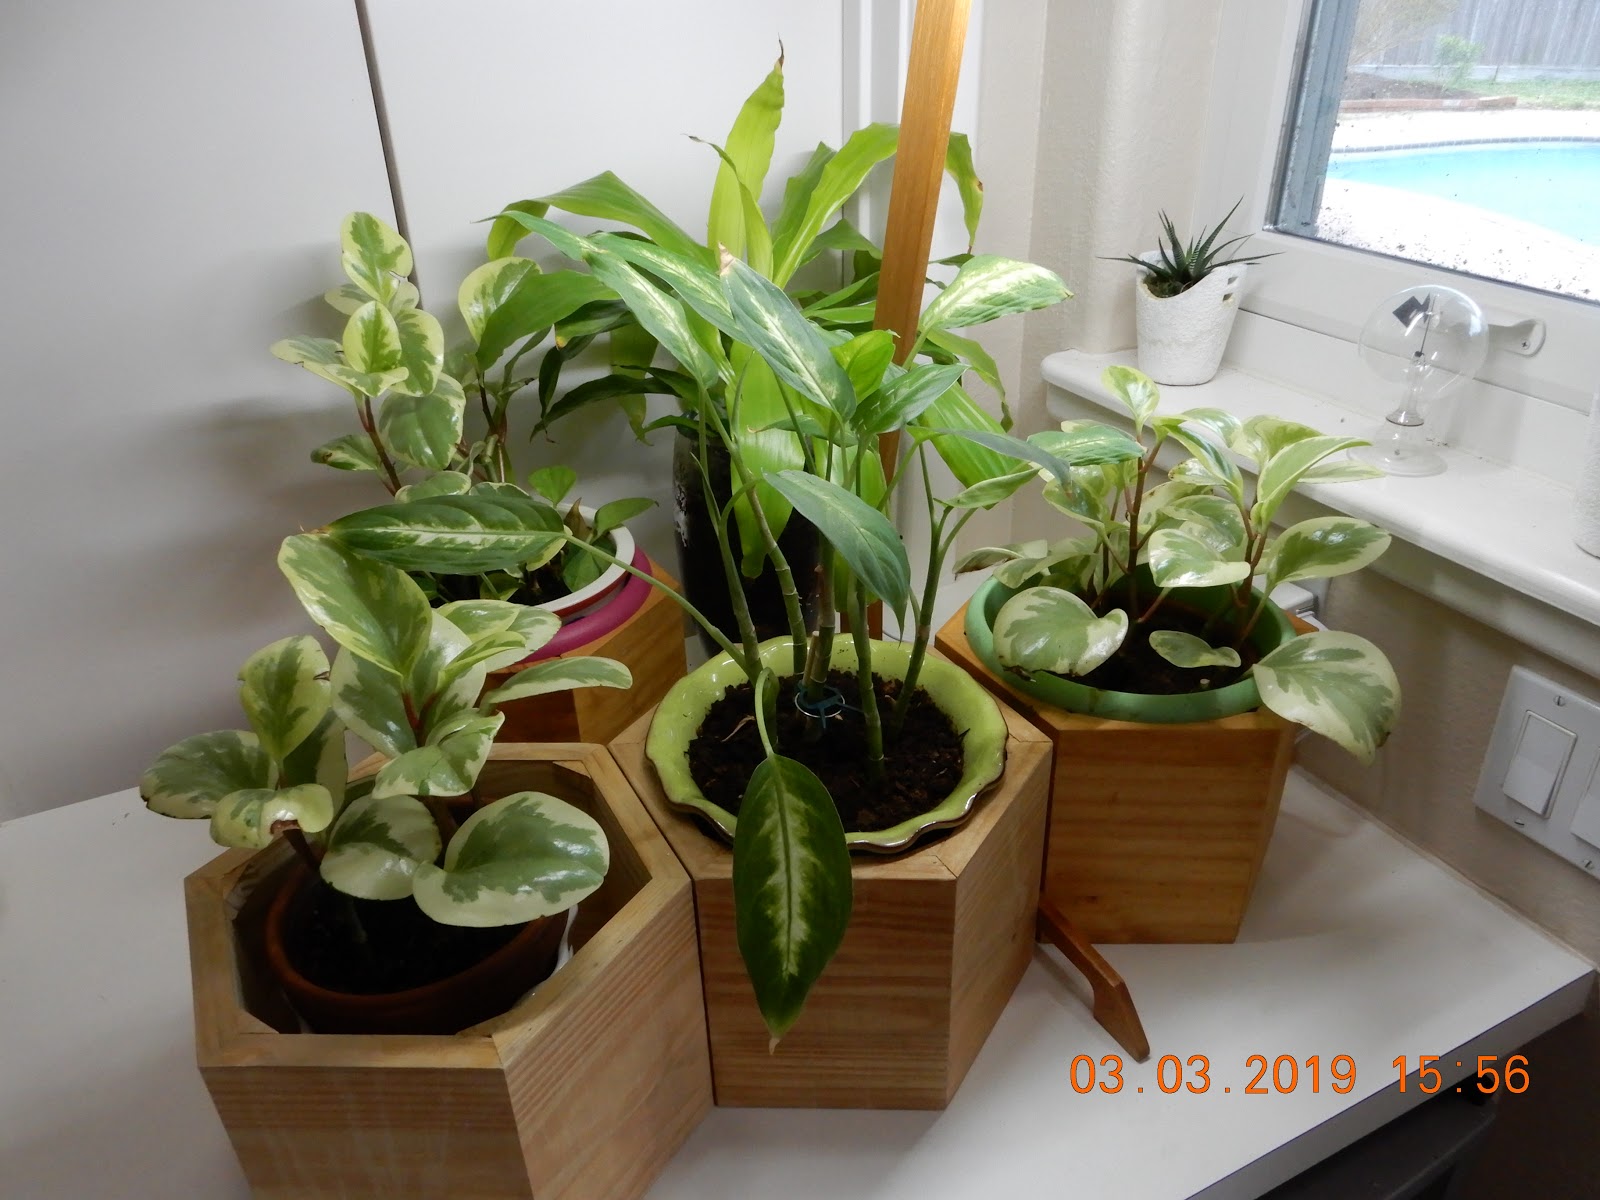
A table can be a plant stand for several planters.
Below is the most massive plant stand. A neighbor gave me a leftover construction material which I used as the central anchor of several planters. That central piece is way too heavy to be carried by one person. I used a dolly to move it.


Older versions, while okay, did take a lot of materials to construct them,


21st Century Bench Hook


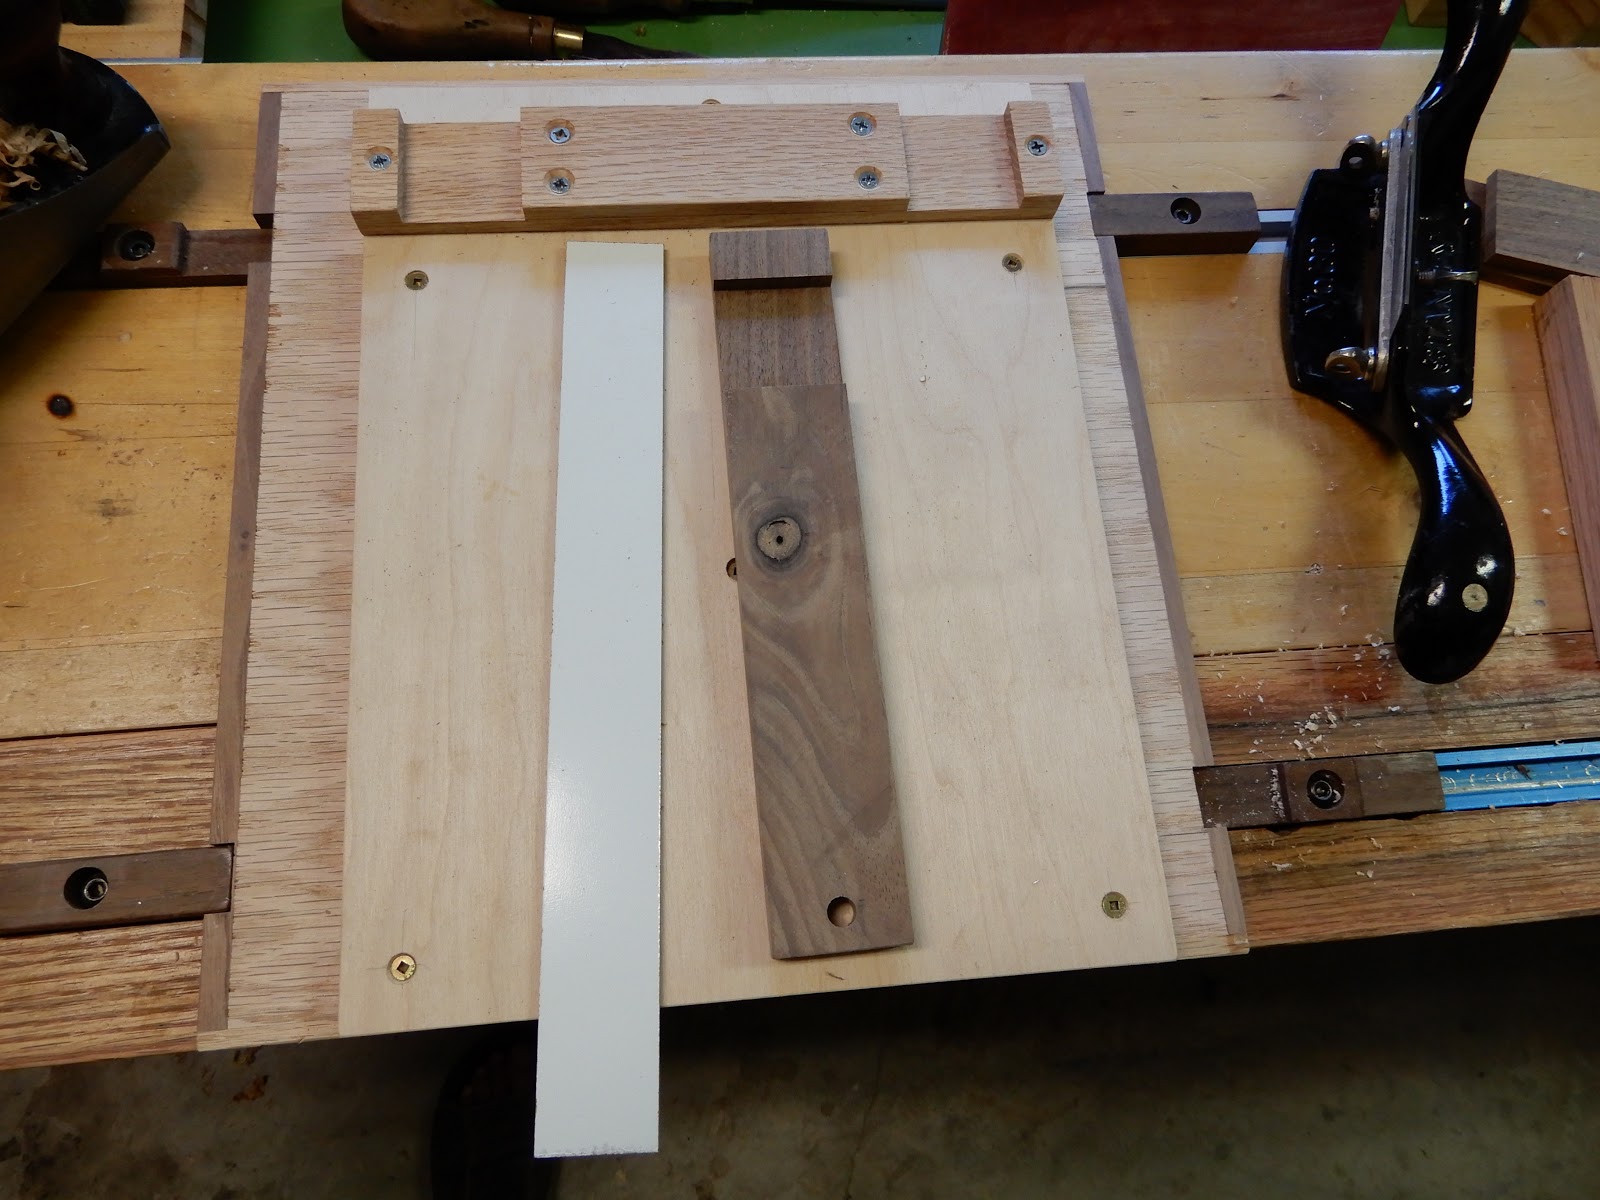
The bench hook as a woodworking accessory has been around for at least two centuries. It was about time I thought it needed to be updated and upgraded in its utility. The hook refers to a lip fastened to the underside of one end meant to "hook" it to the workbench top to keep it from sliding while it is used to hold on to small work pieces. In other words it is a removable small platform meant to protect the table top from saw and chisel marks. My version will not have the usual hook because it is meant to be rotated end for end depending on the use. The photos will explain.


One notable feature of this version is that it has a side stop in addition to the traditional end stop. This side stop can be secured to either the left or right of the bench or removed entirely as the work requires. So this stop keeps the work piece not just from slipping forward but from side movements as well. 


The notches shown in photo take the function of the hook. Next photos show how. More importantly, these notches allow for the bench hook to be secured end over end.

 This bench hook allows for the use of either the traditional Western or Japanese saws.


This new version allows for sanding all different shapes of work pieces to be supported securely. This has many uses for holding small pieces while using block planes, chisels or drills, etc,

Saturday, February 23, 2019

Hole-in-One

Every now and then in woodworking, like anywhere else where one practices a hobby or profession, there is a tool - purchased or acquired a while back in case it is needed - that finally is put to use.  Router bits are a case in point. A long time ago I thought it was worth investing in a rabbeting bit set for a variety of depth of cuts depending on the size of the ball bearing on its tip. It is one of those  things that though seldom used it is worth its price once the need arises. 

Here though is a task that may surprise anyone who may run into enlarging an existing hole. It is almost an impossibility to pull off with precision and accuracy to achieve the proper diameter of the new bigger hole.


This bit will only cut to the depth that the bearing will allow it. With the bearing as guide it will run along the inside diameter of the existing hole while the bit cuts a rabbet on half the thickness of the board.


Shown above with the board turned upside down after the cut where a larger diameter had been cut precisely.


Then comes along a flush cutting bit, where the diameter of the bearing is exactly the same as the cutting bit. The bearing will now run along the wider hole, thus allowing for the bit to cut into the remaining rim of the smaller hole


The whole operation is best done on the router table (another reason why a router table is an essential part of the work shop). The whole board (work piece) is much too large if the router fence remained in place. The fence can be easily removed by taking out just two locking knobs.


The photo below was taken while the bit was spinning to show the enlarging new diameter hole. Holes can be enlarged almost ad infinitum by simply repeating the process over and over until the desired larger hole is achieved.


What was all the fuss about? I needed to relocate one hole (see where it was finally covered with a square 1/4 inch plywood) from an existing location to the center of the top board shown below. The smaller hole was the limit of my spindle drill cutting bit.


This is my 5th generation design of a saw dust interceptor. This intermediate element of the dust collection system allows for much of the saw dust and other waste debris to be caught by the cylinder in between the tool and the dust collector. The aim is for air, mostly air anyhow, to go all the way to the impeller and filter of the collector shown below.

NOT SHOWN  INSIDE AND BELOW THE TOP IS MY DESIGN THAT ALLOWS FOR THE DUST AND OTHER PARTICLES TO SETTLE DOWN WHILE DUST-FREE AIR IS DRAWN TO THE OUTLET HOSE INTO THE DUST COLLECTOR.


Fine dust and coarse debris were trapped at the bottom


So far, I'd say 99 per cent of dust and debris were intercepted. Need to make certain over a longer period of use, but so far so great! This could be something ⦽💡

So far, the dust collector - filter and receptacle looked empty, free of dust!


Monday, December 3, 2018

Table Refinishing 101


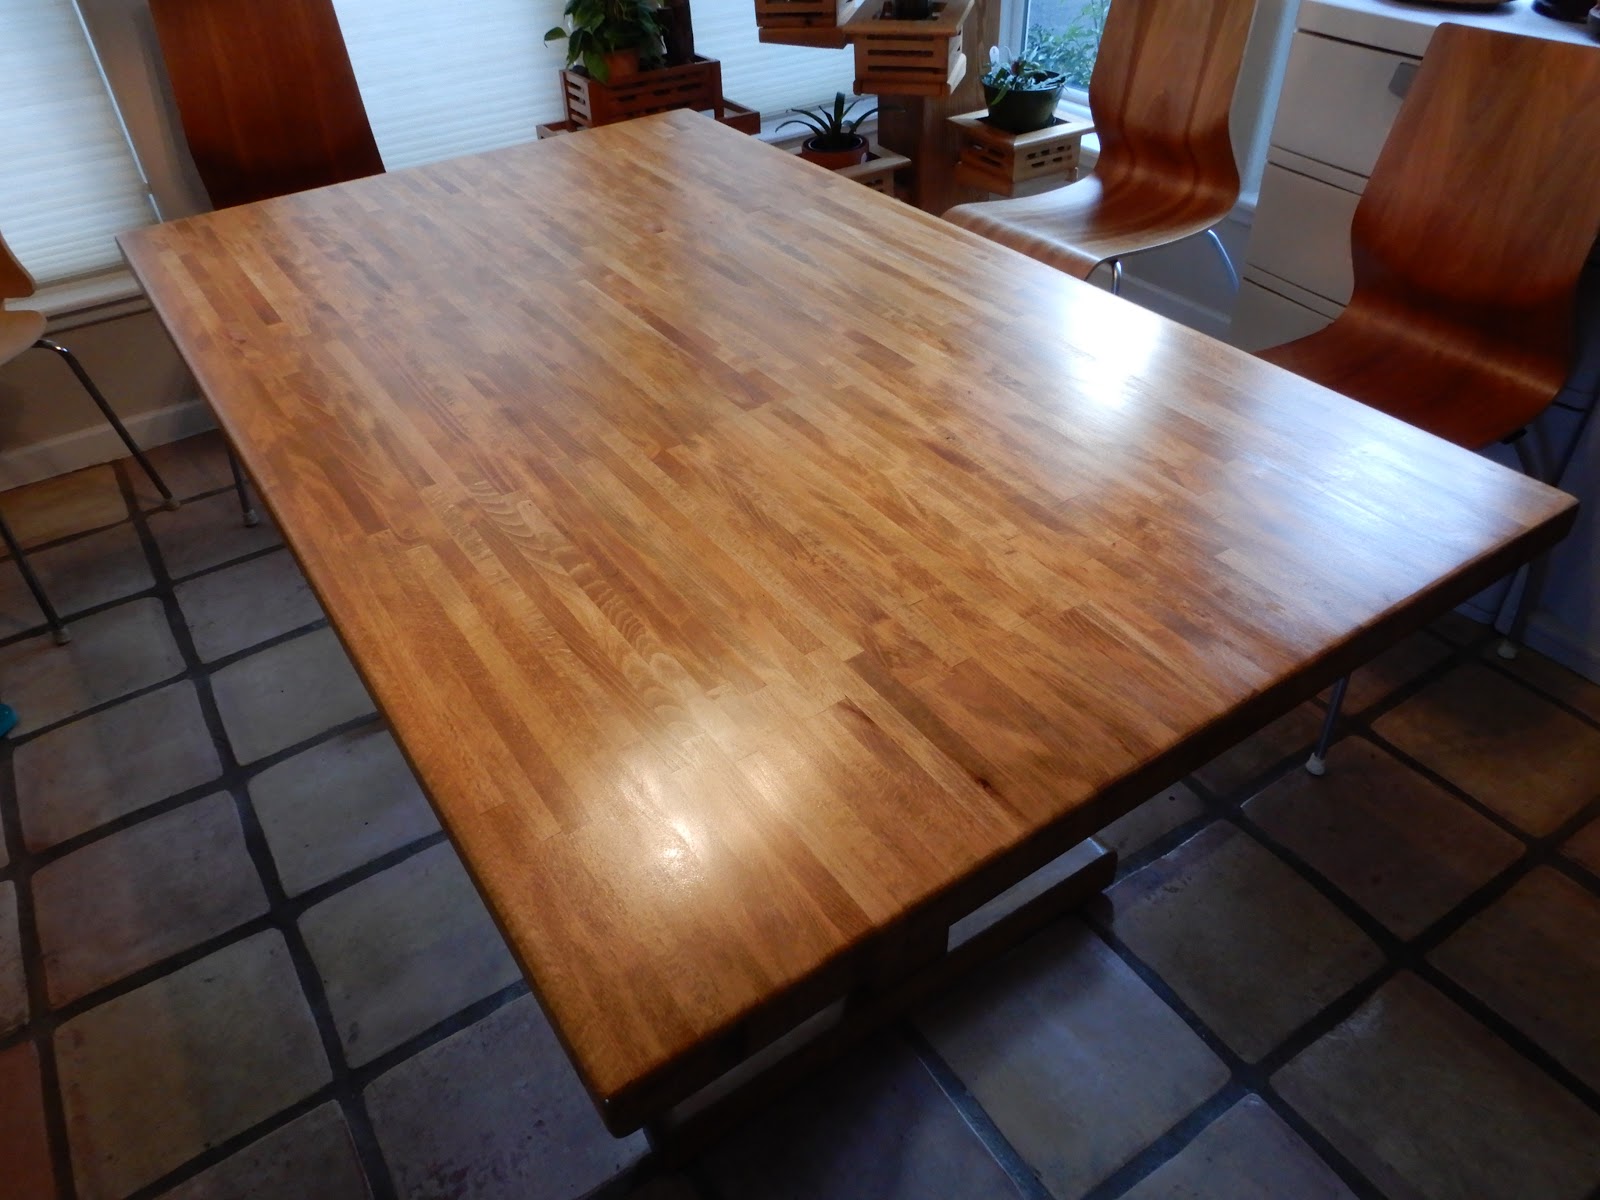
Solid wood furniture can last for generations. However, along the way, assuming no structural or surface damage, its finish will need to be renewed or redone and that is all that is needed to bring it back to its original splendor . It does not need special tools and one hour is all it will take on a furniture like the breakfast table. This table is the most frequently used in our household and sometimes even as a work bench. So, every so often it needs a makeover. We bought this in 1981 as raw furniture (unfinished - rough, unstained, unvarnished) because that was all we can afford of a well constructed piece - a butcher block top. That purchase was pivotal in getting me into woodworking. This is the fourth time its finish is redone. 

Step 1. Remove old polyurethane finish. I opted for a hand card scraper to do the chore instead of sand paper or a power orbital sander. Actually I highly recommend a card scraper on flat surfaces like a table. It is dustless, noiseless and a good light workout. And it is more an art form than using brute force. There is something Zen-like about the swishing sound as it creates a very smooth, even flat surface without the swirl marks produced during sanding minus all the dust flying around the work area. Later you will see how to hone a card scraper.

Not comfortable using the scraper, use sand paper by all means.


A hand card scraper is an edged metal held with both hands, two thumbs pressing two corners against all fingers bending it slightly convex towards the forward direction and slanting it between 30 to 45 degrees leaning forward.
Scraped finish stays right where you end the motion of the scraper.

 I am fortunate to own a very quiet portable HEPA vacuum cleaner but one may simply brush/sweep and wipe off the waste with a moist cloth, and it will be just as effective.


Step 2. Apply new finish

For a table like this I favor tung oil. The oil is extracted from pressing the seeds from nuts of the tung tree, predominantly growing in China. It has the following advantages that  beginners can get into using it with little experience.

a. It is safe and non-toxic that it can even be rubbed with your bare hands. Some crafts people actually like to rub the oil with the heel of their palms because the heat from friction supposedly help the application.
b. The oil penetrates into the grain of the wood, unlike, for example, shellac or polyurethane that coats the surface, creating a shell rather than penetrating. Rubbing application is less critical than brushing or spraying that demands an even coat. Rubbing can be done over and over the same area wiping off excess oil as needed.
c. The oil "shows off" the wood grain in its natural luster while resisting water marks and other liquid, including all kinds of beverages.

Only disadvantage is that total drying time takes overnight, preferably 24 hours after the last application.


Tung oil is a very "forgiving" finish to apply. 


Surface ready for the finishing


Tung oil has that ability to show rather than obscure rich grain of the butcher block table top

Typical use of a card scraper is shown here on bare wood, removing very thin shavings at a time to flatten and smooth a flat surface.
Honing the card scraper is tricky business and experienced wood workers do it unerringly quickly. Burnishing is the easy part. Squaring the edges is difficult to achieve consistently. I made a jig shown below that eliminates the guess work. The scraper is sandwiched between two flat boards to insure a perfect perpendicular orientation to the honing tools - diamond sharpener and steel file.