Welcome to Woodworks Made Easy

Practice any art, however well or badly, not to get money and fame, but to find out what's inside you.
--- Kurt Vonnegut

Pictures are meant to be self explanatory, and for visual clarity you may
click on each photo to enlarge. For older projects see Blog Archive. I don't specialize on a particular genre so there is quite a variety of projects for a number of different interests.

Even if you are not a woodworker but you like some or all of the projects, have your local crafts person make them for you from the ideas and photos you see here. For a particular project just click the specific title on the Blog Archive list (right side column below).

For anyone willing to learn or begin to do woodworking for the first time, please read first from the Blog Archive, "How and Where to Begin a Woodworking Hobby.

And it is not for men only. Read my note on "Women in Woodworking" from Blog Archive, April 2010.


click on each photo to enlarge


Monday, November 7, 2022

Water Feature Anyone Can Do

Water features like the one you are about to read are much too simple to not  even try.  Whether it is as elaborately regal as the one in front of the Bellagio in Las Vegas or one using a Home Depot bucket, or one in between, such as the one here, all operate with one simple principle.  A submersible pump at the bottom circulates the water up and down - coming up as either a fountain, or a water spout or a gently bubbling rivulet on the surface of  stones or slate.  At the bottom of this musing is one not-so-crazy idea worth looking into.

Anywhere from a ten-watt water pump (online choices at economy prices) to a few hundred horsepower pumps in giant fountains, will provide that hard-to-ignore but pleasing sound of water in motion.

What surprises the most is that it does not need a large volume of water in a reservoir to make this feature work.  Even a Home Depot bucket needs only 2-3 quarts of water, enough to submerge the pump, for it to work. For most home applications the ideal container could be a half wine barrel (or a whole one, if preferred) that can be purchased from most home centers. Wine barrels provide that vintage, unique look and affordability.  

The photo below is a commercial one.  A Home Depot bucket will look like that. Further below shows why this water feature is also called a "disappearing fountain".  This can definitely be a mini project, limited only by one's imagination.


 The water that seems to disappear below the stones actually re-circulates back up to the bowl through a PVC stand pipe and a small pump below.

I've discussed this feature in our home before in a prior blog but  it has to be revisited because one day it just stopped working. It was seventeen years ago when I did the project.  It means, alas, that I was then 17 years more limber than today.

After removing all the surface stones and the support grate and screen, the bottom with the rubber liner is revealed. Obviously, a bucket or other containers will not need a liner.  A wine barrel surely will.  Rubber liners can be purchased online as well.  The woodworking part is actually beneath and behind the liner, which served as the framework and support for the rubber to remain in place.  The grate is hard plastic that is also available at either home centers or water garden stores.  The grate will support a person's weight.


Below is the old pump that stopped working.

The new replacement pump (all black, left of photo) is next to the old one. 

But lo and behold when I tested the old pump in the kitchen sink, it still worked!  What happened, perhaps, was that there was just not enough water depth, which means not enough pressure "head", to prime the pump. Water depth is invisible from the top when covered with surface stones.


I had a decision to make.  Should I keep the old one?  I did. It was made in USA vs. the foreign made one (guess where?), so I stuck with the old one.


I put the grate back and started to replace the stones.


The screen provides a flat barrier to hold tiny pebbles from falling through the grate.


Well, it was all worth the back breaking effort.


There is something soothing and calming about water bubbling up over the surface stones, specially during those quiet moments.  Note: it is best that the reservoir should have water only barely above the pump.  That allows for water coming back down more space to travel for that classic water drop that reverberates in a hollow chamber.

For a sample of how the water feature looks and sounds, click the link below:   There are many others on YouTube.  

 https://nelsonwatergardens.com/disappearing-fountains/


Now, here is a not-so-crazy idea. Order a grate, shown below, a rubber liner and a 30-50 watt pump.  Dig a hole in your backyard to the approximate dimension  of the grate (actually, make the area slightly smaller).  Put the rubber liner, covering the bottom and sidewalls of the hole.  Install the pump, with a PVC stand pipe just barely over the grate.  Put stones on top.
YOU NOW HAVE A DISAPPEARING FOUNTAIN!!


Background story:

{I told this story before.  When we purchased the house in 2005, there was a hole in one corner of the living room. Apparently, the previous owner had the great idea of a little water feature that involved water to flow out of the top of the big stones into a tiny pond.  The idea was great except that the porous rock would get soaked that ended up wetting the floor as well.  So the previous owner decided to put dirt over the hole for plants to grow.  Without the necessary grow lights that idea too did not work.}

That was the reason why I did the water feature project.  Plus the fact that the home insurance company was adamant that the hole needed to be covered. That's the reason too that the grate must be able to support a person's weight.

Saturday, October 1, 2022

Repurposing Mr. Coffee Maker

The old but still working "analog" Mr. Coffee Maker had to be retired, replaced by a digital model.  

The main body had to be disposed of but I thought the coffee pot could be repurposed into ..

I ripped one piece of oak that came from an old barn in Mississippi into 3/4 by 3/8 workpiece strips. Hardwood like this and the pot still have another purpose.


This gizmo serves again!

Half lap and dado joinery without measuring is what this gizmo - called a kerf maker - does.  I've discussed this in detail from an earlier project.

Glue up is easy with dado joinery.  As always, use a square to check for the 90-degree joint

Cutting the taper on the four posts. Only possible and repeatable on a jig I made. The operation is done safely and accurately.


The taper is then further shaped on the router table

Smoothing with an oscillating drum sander

As with an earlier project the intersection will not be glued


Mr. Coffee Pot is another non-draining planter.  I am convinced this is the way to go.  Less water, no run offs, and house plants (though not all) love it. Check previous blogs about non-draining planters.  


Hard to let go of a tempered glass coffee pot like this


Below with some of the non-draining planters that are doing well since first planted a while back


Below, another tempered glass that in its previous life was half of a convection broiler, is another drainless planter.  Next to it is another that used to contain candies. 


Friday, September 2, 2022

Scary Sharp

What kind of knife is it that looks like one that comes with your fast food order yet sharper than the sharpest steel knife? It is also made from material that has a hardness rating almost twice that of normal steel.  Where diamond is rated at the highest possible Mohs scale of 10.0 (max), this knife has a rating of 8.5.  Hardened steel infused with high carbon has a hardness of 7.5. In some tests, this knife maintains its edge at 10X that of steel knives.

Slicing tomatoes into almost paper-thin slices to a transparency of cellophane challenges the sharpness of any knife. Not with this one. 


It will devein shrimp with the precision of a scalpel.  I've seen sushi prepared with it by master chefs.


Readers of this blog have seen my fondness for kitchen knives over a few projects. Several of them were from fashioning handles for bare blades and knife stands from hardwoods, as shown below.


So, what's up with this non-steel, plastic-looking knife that is worthy of a woodworking project?


We are talking about a ceramic knife. Obviously, this is not ceramic as in your coffee mug or favorite China or figurines. 

Ceramic knives have been around since the 90's but it didn't as much as pique my interest.  Then one day I read that the reason leftover avocado, sliced or pureed, turn brown is  when steel or any metallic knives are used to cut, slice, or scoop them.  We love avocado.  A ceramic knife which is non-porous, non-reactive, fits the bill.

I ordered just the one - a 3-inch paring knife, just to see if it lives up to its advertised feature.

Out of the box, scary sharp is an understatement.  It will have a role and a special place to deserve its own stand.  Will I buy a set of ceramic knives of various sizes and functions for the kitchen?  Later on that at the bottom of this blog and you may skip the woodworking part.


I barely made a dent on my stash of scrap hardwoods with the last few projects.  Another opportunity presented itself.


Shaping a piece of  3/8 inch acrylic on the router table


Joinery between acrylic and wood


Cyanoacrylate or CA glue is best for joining the materials involved


For me, one ceramic knife is all there will be in our kitchen.  But first this. It is definitely scary sharp. It will not rust or stain.  It is so light weight that it can be mistaken for a plastic knife. It cleans easily, it will not absorb any of the odor usually associated with fish or meat.

I am a traditionalist when it comes to knives and my favorite ones are high carbon but not stainless steel knives.  They will rust if I don't wipe them dry after each use and they will stain to almost a permanent patina after a while. They have heft, needs regular honing but will last over several lifetimes.    Cleavers will stand up to mallet blows when cutting through bones and fillet knives can only be from thin, narrow pliable steel.

"Ceramic knives are not at all great for chopping, prying, filleting/de-boning or carving, i.e. many of the motions you’d expect when dealing with meat and fish. These impacts can damage the blade and the knife’s inflexible nature means delicate maneuvering around bones (filleting for example), which may require you to press down and flex the blade, and can actually damage or break your knife".

"Don’t
.Put it in the dishwasher, it will probably break
.Store unsheathed with other objects, it will get chipped and crack
.Use chipped or cracked knives, unless you want to risk getting injured
.Chop, twist, pry, debone or otherwise apply a lot of force or pressure to the knife

My answer to the question earlier is no.  My one and only ceramic  knife would be this 3-inch paring knife and it has 0nly one special use.

However, ceramic knives have a place in households where sharpening or honing is not a resident skill.  And if one must buy a ceramic knife, I recommend that you go with a good brand.  My recommendation is Kyocera.  This comes from Japan.  The name is a portmanteau of the Japanese city in west-central Honshu island, Japan - Kyoto  and ceramic, hence, Kyocera.  There is a wealth of reading materials and YouTube videos if one chooses to research this tool.  


Friday, July 8, 2022

Anatomy of a Small Workshop Part 1

As hobbyist workshops go, my workshop can only be described as adequate, at best, petite by some standards.  Though I'll have to say, more than petite projects have come out of it  over the years.  The previous owners of the house (built in 1990, we purchased it in 2005) had this built in addition to but separate from the three-car garage at the back of the house.  It was made as a garden/yard tool room at the back of the house adjacent to the garage. It is only 205 sq. ft, or 18.5 sq. meters for my metric readers. It's 1845 cubic feet, or 53 cu. meters. (This matters, of course, for cooling or heating calculations). 

Below is almost a drawn-to-scale layout where the blank grids are the areas I can move about, while the shaded rectangles are the tools and other space occupiers that are excluded from foot traffic. And it is definitely a one-person workshop.


Part 1 is the Workbench

If the table saw is the heart of a woodworking shop, the workbench must be the brain.  This is where the woodworker would stand next to when contemplating about the project, make some sketches, think over a beverage while wondering what is next, or simply resting on a stool while doing more serious contemplation.

If the table saw is the mouth, doing all the chewing and cutting from big work pieces to small pieces, the workbench is the stomach, where all the digesting takes place, glue ups and assembly, because this is where the workpieces then become useful projects.  At least, that is the ultimate plan. Now, woodworking is possible without the table saw but clearly a non-starter without the workbench. It can be as low as a foot or less above the floor, as in ancient-style Japanese woodworking (still practiced today by Japanese purists) or 28 inches or higher in modern workshops.

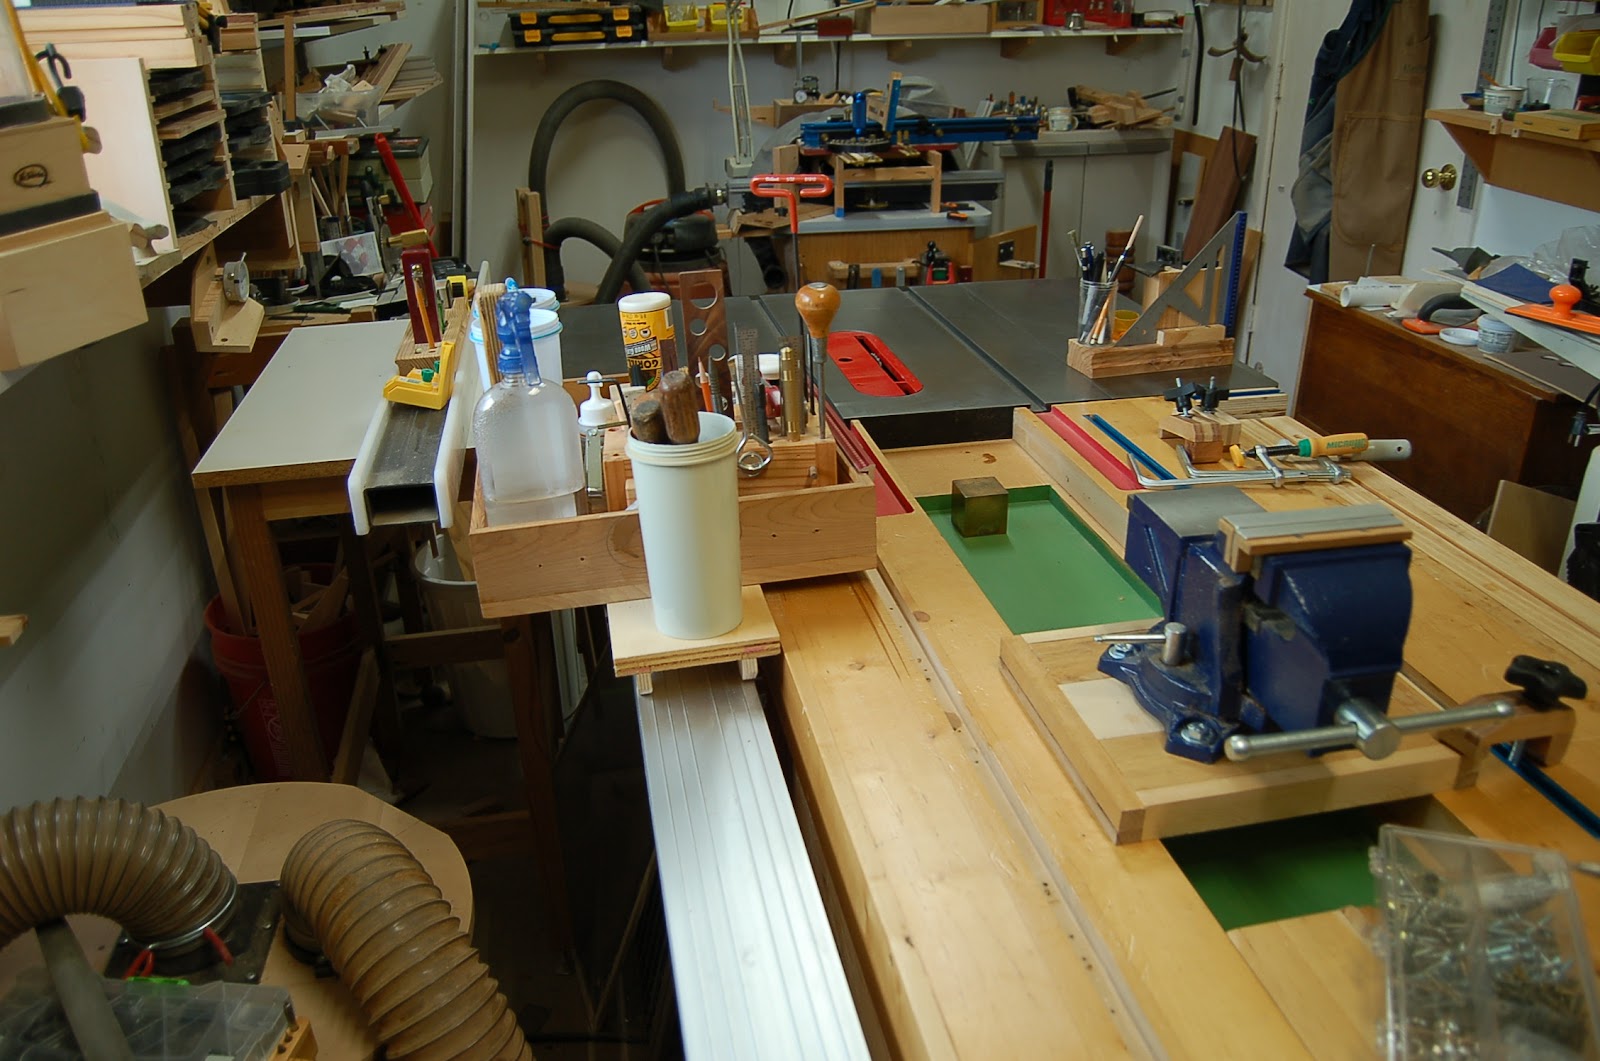
Years ago I purchased a baker's table made of maple. Its original mission, I was told, was to be at the bakery. With a portable circular saw, I ripped it lengthwise into three sections: a wider piece and two narrower pieces. I turned it into a European-style workbench which is defined mainly by a center channel somewhere in between what essentially looks like two bench tops.  The idea is for the channel to serve as repository for wastes like shavings, chips, saw dusts or as a space to park hand tools like chisels, hand planes, etc. while not in use but easily within reach by the woodworker. 


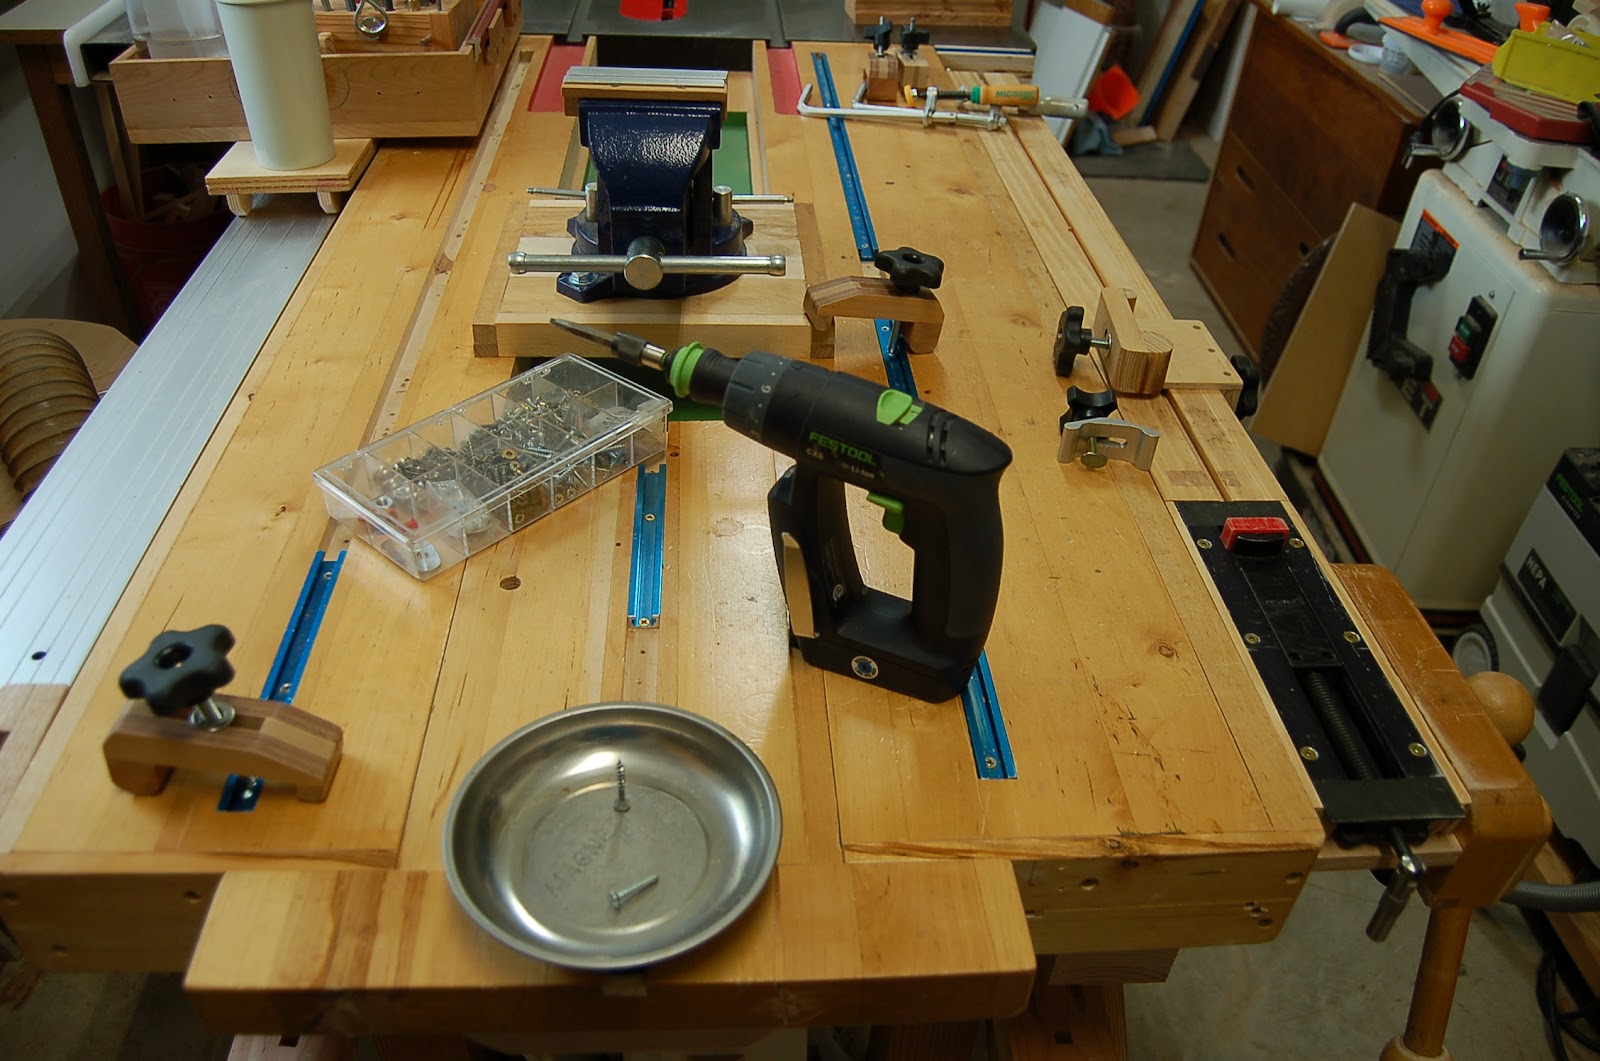
It is about 28 inches tall, 29 X 53 inches overall at the top. I positioned it so its one end butts directly into the forward end of the table saw. The narrow painted red channels will accommodate the runners for a table saw sled to run into (if used).  There are T-tracks (blue) for T clamps for various clamping locations on the table top.

The center channel, in this case, provides a way for other useful tools or tool rests to slide into temporarily.  For example, if I needed a small vise, it can easily slide in (with side spacer-stops underneath) and clamped securely.


A section of the center piece from the original top serves as a temporary extension  that can slide in and out, guided by drawer-style runners on the side.  Once clamped, even temporarily, it is quite a robust extension.

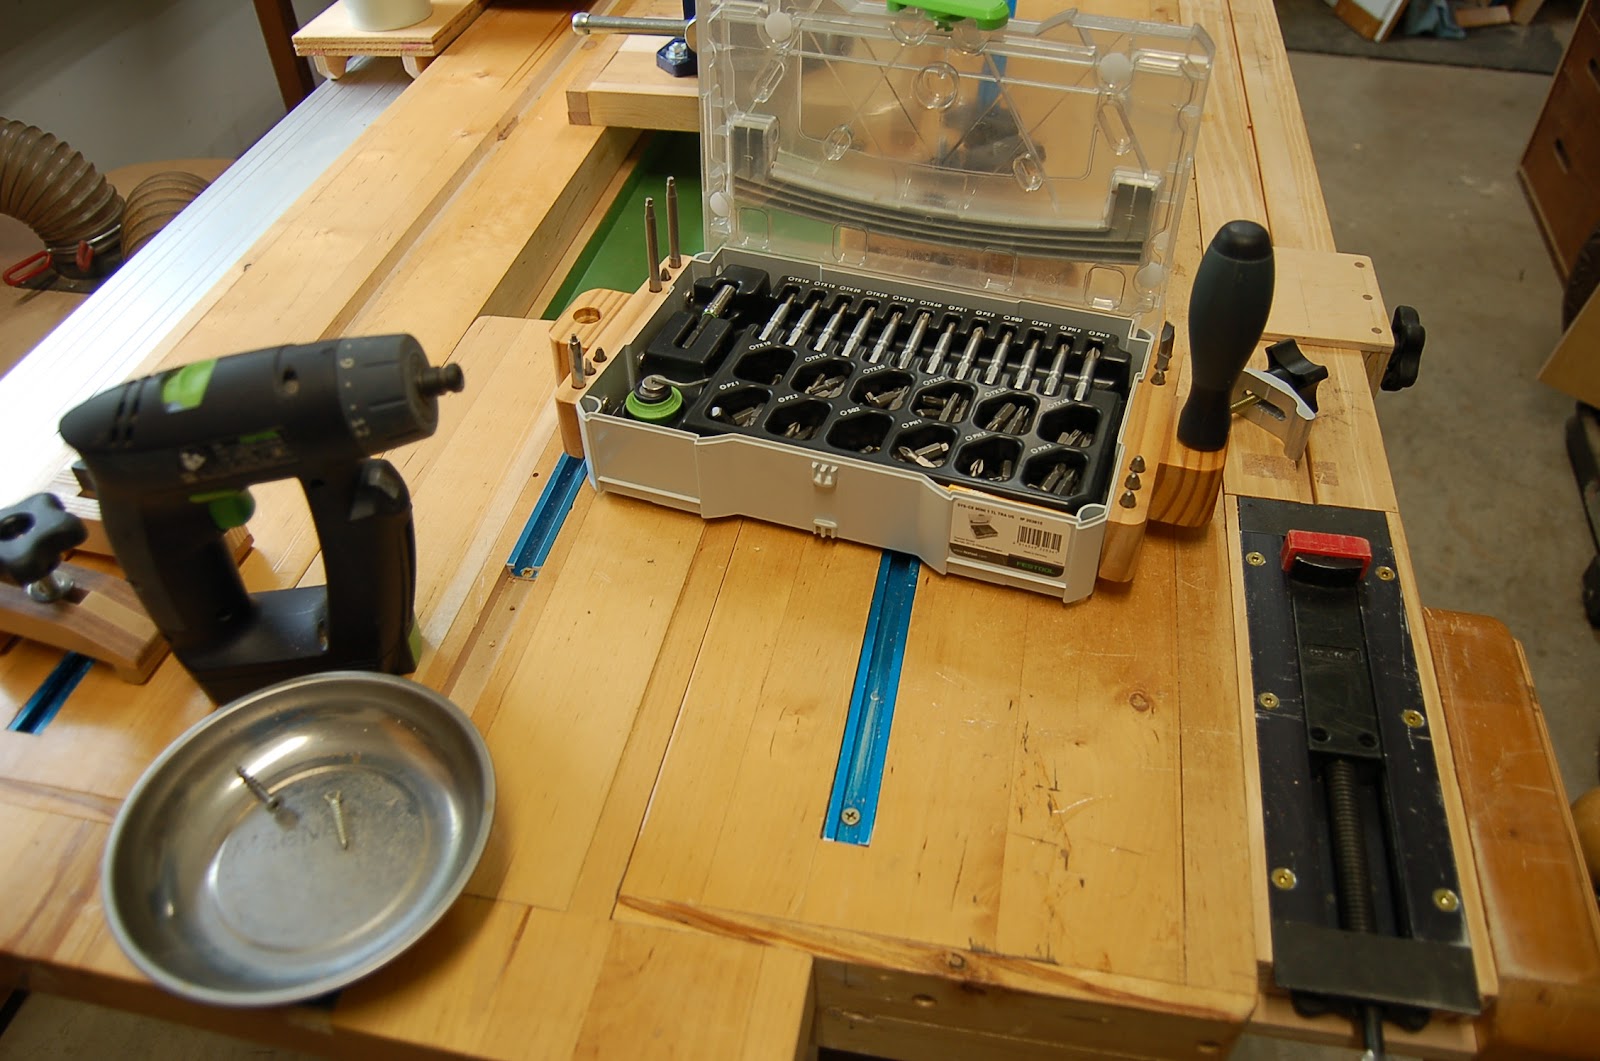
A metal strip at the top of the  T serves as anchor plate for a magnetic tray shown below. It's an excellent receptacle for screws, nuts and bolts.

I made a mini work bench that can be temporarily but securely clamped as shown. It is quite capable of holding on to small and medium workpieces. It is an excellent gluing platform because with an elevated platform the base it provides make clamping easy and more effective.  The elevation it provides make close up work without having to stoop for a close look.

Below, another clamping platform on top makes for additional options.  All of these can be stowed away when not needed.

Overall, I believe this work bench has made this petite workshop more than adequate.  Of course, who doesn't need a much bigger space?  Yes, of course, but it comes with a price.  It will cost more to cool (Texas summer can discourage even the most ardent woodworker if not for air conditioning). It will also warm up quickly in the winter.


But there is more.  Uniquely, I fashioned this tray - holder for various tools and accessories, securely on a runner from an old rowing machine.  This makes  this a unique receptacle and repository of accessories accessible from one end of the work bench to the other .


Visible below is the rowing machine runner where the tray can slide to and fro.  It can also be temporarily set aside if needed.


A sharpening station


Assembling is the penultimate to a hopefully rewarding denouement for any woodworking project.

This bench is also a great platform for several bench top power tools - miter saw, scroll saw, sander, planer, etc. which from time were shown in my other earlier blogs.

So, the work bench is the brain of the workshop.  And for the traditional Japanese craftsman, who only uses hand tools exclusively to do their projects, it can be both the heart and brain of the workshop.