Welcome to Woodworks Made Easy

Practice any art, however well or badly, not to get money and fame, but to find out what's inside you.
--- Kurt Vonnegut

Pictures are meant to be self explanatory, and for visual clarity you may
click on each photo to enlarge. For older projects see Blog Archive. I don't specialize on a particular genre so there is quite a variety of projects for a number of different interests.

Even if you are not a woodworker but you like some or all of the projects, have your local crafts person make them for you from the ideas and photos you see here. For a particular project just click the specific title on the Blog Archive list (right side column below).

For anyone willing to learn or begin to do woodworking for the first time, please read first from the Blog Archive, "How and Where to Begin a Woodworking Hobby.

And it is not for men only. Read my note on "Women in Woodworking" from Blog Archive, April 2010.


click on each photo to enlarge


Saturday, February 17, 2018

Old World Hand Plane 21st Century Version

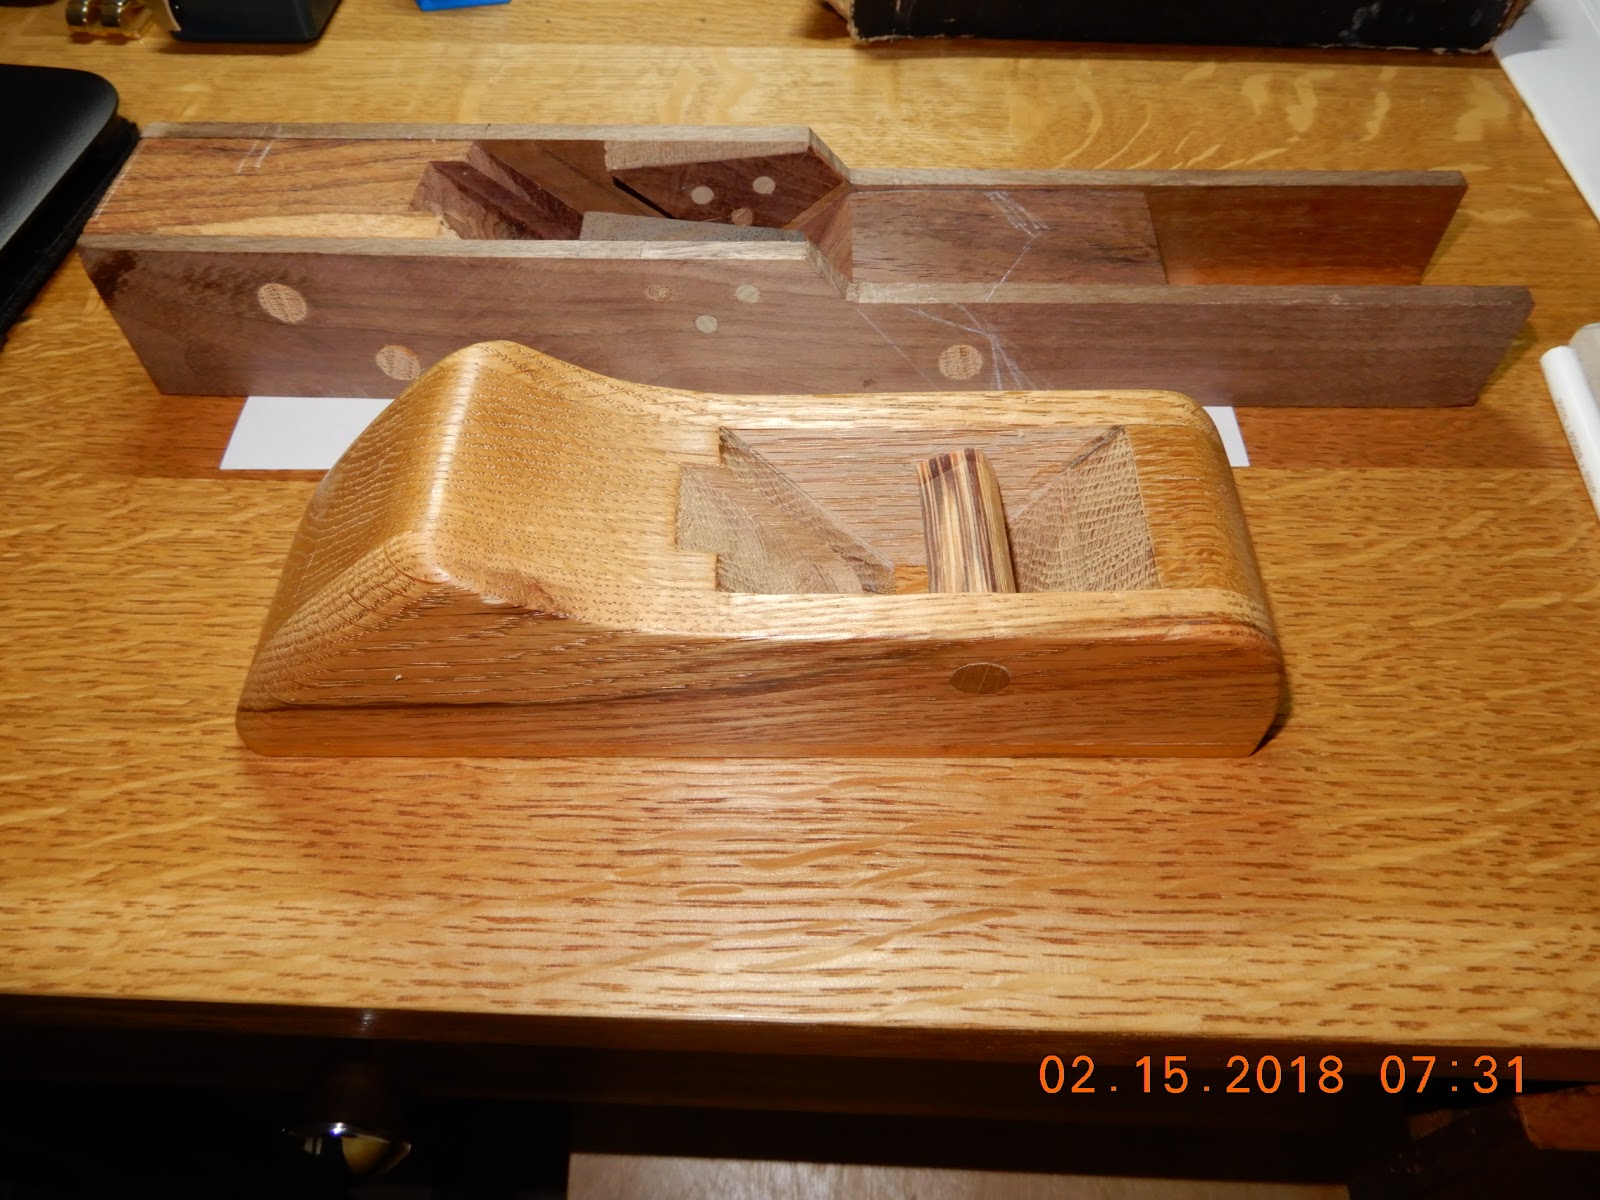
We traveled to Australia three months ago and at the Immigration Museum in Melbourne one exhibit caught my eye. It was a hand plane brought by the new immigrant/craftsmen from the Old World to the new territory almost three centuries ago. There was something about its design that captivated me.


I knew I wanted to try and make one with that special feature in its construction. When I got back to our hotel I had to draw a sketch on the hotel stationery of how it would look like if I were to make one. 

I made a block plane (photo below) years ago that had served me well. It had a blade from Hock Tools which I was going to use for the new version.  Instead of the rounded and curved lines I was going to update the design profile with angled straight lines, taking inspiration from the stealth plane - the F-117 Nighthawk.  More importantly, almost all common wooden hand planes have a cross pin against which a wedge is inserted to hold the blade. From the photo above two triangular wings serve as the cross pin. One advantage is that in this wedge system a longer lateral pressure is exerted on the blade. The weak point however is presented by the wings which can be sheared off over time as the wedge is inserted more forcefully repeatedly. Also, a higher degree of difficulty is presented in the construction of the wings. It is probably the reason it lost its popularity among tool makers then.


I chose a 40 deg cutting angle
The two main bodies of the plane will be held and glued together by two parallel sides. 
Tip: Drill holes the size of dowel pins to mark the location of the two sides for ease of final glue up. Double sided tapes secured them together temporarily.

Creating the wings (see photo below)


Each wing is glued to the inside and strengthened with three 3/16 dowel pins. 


I had to do a test cut just to make sure it will work even before it is completed, and sure enough it did cut.


"Proof of the pudding is in the eating", so the block plane must perform ... and very well indeed. Because it is not a power tool the swishing sound is clearly audible as it cuts the wood fiber to the thickness of onion skin. It is so relaxing, almost therapeutic, to actually hear yourself work. This hand plane and a few others like it (shop made and restored old tools) in my shop are what makes woodworking fun,  Every curled wood shaving is a reward to the senses.


Tuesday, November 7, 2017

Micro-Projects Updates

The scrap wood heap is a little bit thinner now, after a few months of micro projects. I am confirming also that non-draining vases for house plants really work. When my wife and I started growing them we had some doubts; not only did they survive, they are thriving. As mentioned in an earlier edition, non-draining vases have the advantage of no-spills, less water use and vacation proof for two-three weeks before watering. I recommend clear see-through vases for one reason: See water level at each watering to attain 1-2 inches from the bottom (water to 1 inch if you prefer to water weekly; 2 inches for 2-3 week watering). The roots will seek the "water table" while the root system is prevented from "drowning" (you all know what is meant by that). {This is just a group picture; they're usually at various locations around the house}

The latest micro-project and likely the last of this category is shown in the second photo below. That will be the featured project here using an entirely different technique.


The vase will seem to float between four pillars
The X-frame will hold the four pillars together and serves as the platform to support the vase.

The four tips of the X-frame will be cut as tenons to fit snugly into angle mortises on the pillars. The photos best explain the idea.


Saturday, November 4, 2017

Wood Fixing Plastic


Seldom is wood used to fix a household appliance unless an opportunity presents itself. Photo below shows the plastic handle on our dishwasher cracked. Epoxy alone will not be enough to fix it.


With a piece of paper I traced a pattern as shown. I used a piece of marble wood from the scrap heap

A coping saw made quick work of cutting the outline from the pattern

Light chisel work and sand paper smoothed the surface.

Two coats of polyurethane

Epoxy and light clamping with masking tape secured the piece until the glue dried completely


The reinforced plastic handle is now stronger than the original