Welcome to Woodworks Made Easy

Practice any art, however well or badly, not to get money and fame, but to find out what's inside you.
--- Kurt Vonnegut

Pictures are meant to be self explanatory, and for visual clarity you may
click on each photo to enlarge. For older projects see Blog Archive. I don't specialize on a particular genre so there is quite a variety of projects for a number of different interests.

Even if you are not a woodworker but you like some or all of the projects, have your local crafts person make them for you from the ideas and photos you see here. For a particular project just click the specific title on the Blog Archive list (right side column below).

For anyone willing to learn or begin to do woodworking for the first time, please read first from the Blog Archive, "How and Where to Begin a Woodworking Hobby.

And it is not for men only. Read my note on "Women in Woodworking" from Blog Archive, April 2010.


click on each photo to enlarge


Sunday, November 6, 2016

Anatomy of a Cabinet (A Simple Way to make One)

If you look around your home the most likely common fixture are cabinets - from bathrooms, to kitchens, and chest of drawers in the bedrooms, etc. Like most woodworking hobbyists I hesitated early on to venture into making them before I got comfortable doing the "simple" stuff. But then the itch to build my own stereo speakers kicked in (see last photos below). It was a bold move considering I didn't have as many tools as I have now, let alone the experience or expertise. It was even bolder, if not entirely irrational or plain nutty) to spend over a thousand dollars in speaker components, sans the cabinets, in 1980's dollars. That's what happened when one is bug-bitten by obsession. But the raw (or kit) speaker manufacturer, Electro Voice (no longer making kits, I don't think) made it so enticing and re-assuring for the do-it-your-self-er, that I jumped in with one eye closed.  That was then and many cabinets later I thought I'd share a simple project.  This will be a single stand-alone side cabinet with drawers that will sit next to my small desk by the breakfast area. I needed drawers for drawing paper, drawing implements, etc. that my wife wants me to keep out of sight if I'm not doing any drawing. Oh, well ...

Using plywood to make cabinets is not only economical the stability of the material offers more structural sense. But we need to deal with the exposed edge of the plywood.  So, first order of business is to rip thin strips of solid wood, oak in this case, to cover the edges.
I chose 3/4 inch Baltic plywood. It has no voids between the ply, as some plywood do.
To make the final cut more accurately manageable I first cut the four parts into slightly over-sized dimensions. Tip: I personally find it easier to make the cut more accurate when the saw blade is removing a sliver (like shaving) and the tool is not under too much stress. I do this whenever possible specially on miter cuts when the blade is tilted. Note: a stop block should be used if the board is shorter than the miter guide.
Glue was used to join the strips to one edge. Tip: By simultaneously clamping two separate pieces, edge to edge, clamping force is applied more evenly. Ordinarily when clamping just one piece at a time it is mandatory to use a rigid straight edge between the clamp and the work pieces for even pressure; otherwise, use more clamps along the edge.
The strips were intentionally slightly wider than the plywood edge. The excess can then be made perfectly flush.  A hand plane, sand paper, etc. will do that but here the router table and a flush trim bit makes quick work.
The 45 degree miter and final cut was made at the table saw.  By the way, the table saw just makes it convenient but a hand-held circular saw guided by a straight edge will make the cut just as effectively. In fact, I used it in making the speaker cabinets. Tip: for large pieces of boards the circular saw will probably be safer than running them through the table saw.
Using this method of corner clamping to join the pieces is very effective.  See previous blog on this method. (See the "featured blog" - Fixture for stronger corner joints by clicking the title at upper right hand)

A back panel cover was glued to the back side which, by the way, adds tremendous strength to the joints. In commercially-made cabinets the back panels are nailed or stapled. 


The cabinet will be next to a plant stand by the table so I made the cabinet legs match the ones on the stand.  Glue and biscuit joinery could have been used but I thought I'd show-case once more the effectiveness of pocket hole joinery, in the following photos. You will note that the pocket holes are going to be entirely invisible to the outside view.


The right angle accessory attachment to the drill makes easy work of driving the pocket hole screws on the inside; otherwise, the pocket holes should be placed outside (or, this is where biscuit, dowel, and other joinery should be used to avoid exposing pocket holes)


This blog is just all about the cabinet. A following blog will be about making the drawers.  So, till then...

 Meanwhile, this was the speaker built in the early 80's.  As mentioned, I used a hand-held circular saw to cut the work pieces including the 45 degree corner miter.  The speaker manufacturer specified the dimensions, including the rectangular hole at the lower center. The "hole" is critical to this "bass-reflex" design of the speaker system. Not shown are internal braces between the front and back panel and the electronic dividing network.  The latter regulates the output of the woofer, the mid range horn and the tweeter horn.  How did it sound? If you played Tchaikovsky's 1812 overture as recorded by Telarc Recording of the Cincinnati Orchestra using actual digital recording of the Fifth Virginia Regiment cannons during the finale, you will actually feel as well as hear the booming sound as if you were there next to them. The mid-range horn accurately captures the raspy voices of jazz singers, soft delivery of vocals, or the localization of the cello and oboe, etc.
 Unfortunately, the speakers now serve mainly as flower stands because smaller cube speakers for surround sound of today's new audio-video systems made the behemoths almost an anachronism.  But someday, if only I can convince my wife to go along, I will have vacuum tube amplifiers playing vinyl records on a turn table (which I still have) with these speakers.

Friday, October 28, 2016

Grow Light Fixture 2G

Grow lights had been around for decades although early on they were used mostly in commercial applications, i.e. in green houses. For a while now grow light bulbs are available for household use, mostly fluorescent but lately in LED as well.This is my second version of a shop-made grow light fixture, using a 24 watt T 5 fluorescent bulb. Commercial light fixtures are inexpensive and widely available at home centers and lighting stores but you know this is a woodworking blog, so I had to fashion my own and so can you. Please refer to the featured blog (upper right hand of this page) of an earlier version. Grow lights are a must in places where the household plants are not getting the exposure to sunlight, as in corners away from windows.


This time, as I had done in another project, I am using an old camera tripod as a stand for the fixture.  The material as in the first version is from reclaimed white mahogany (see some nail holes visible).


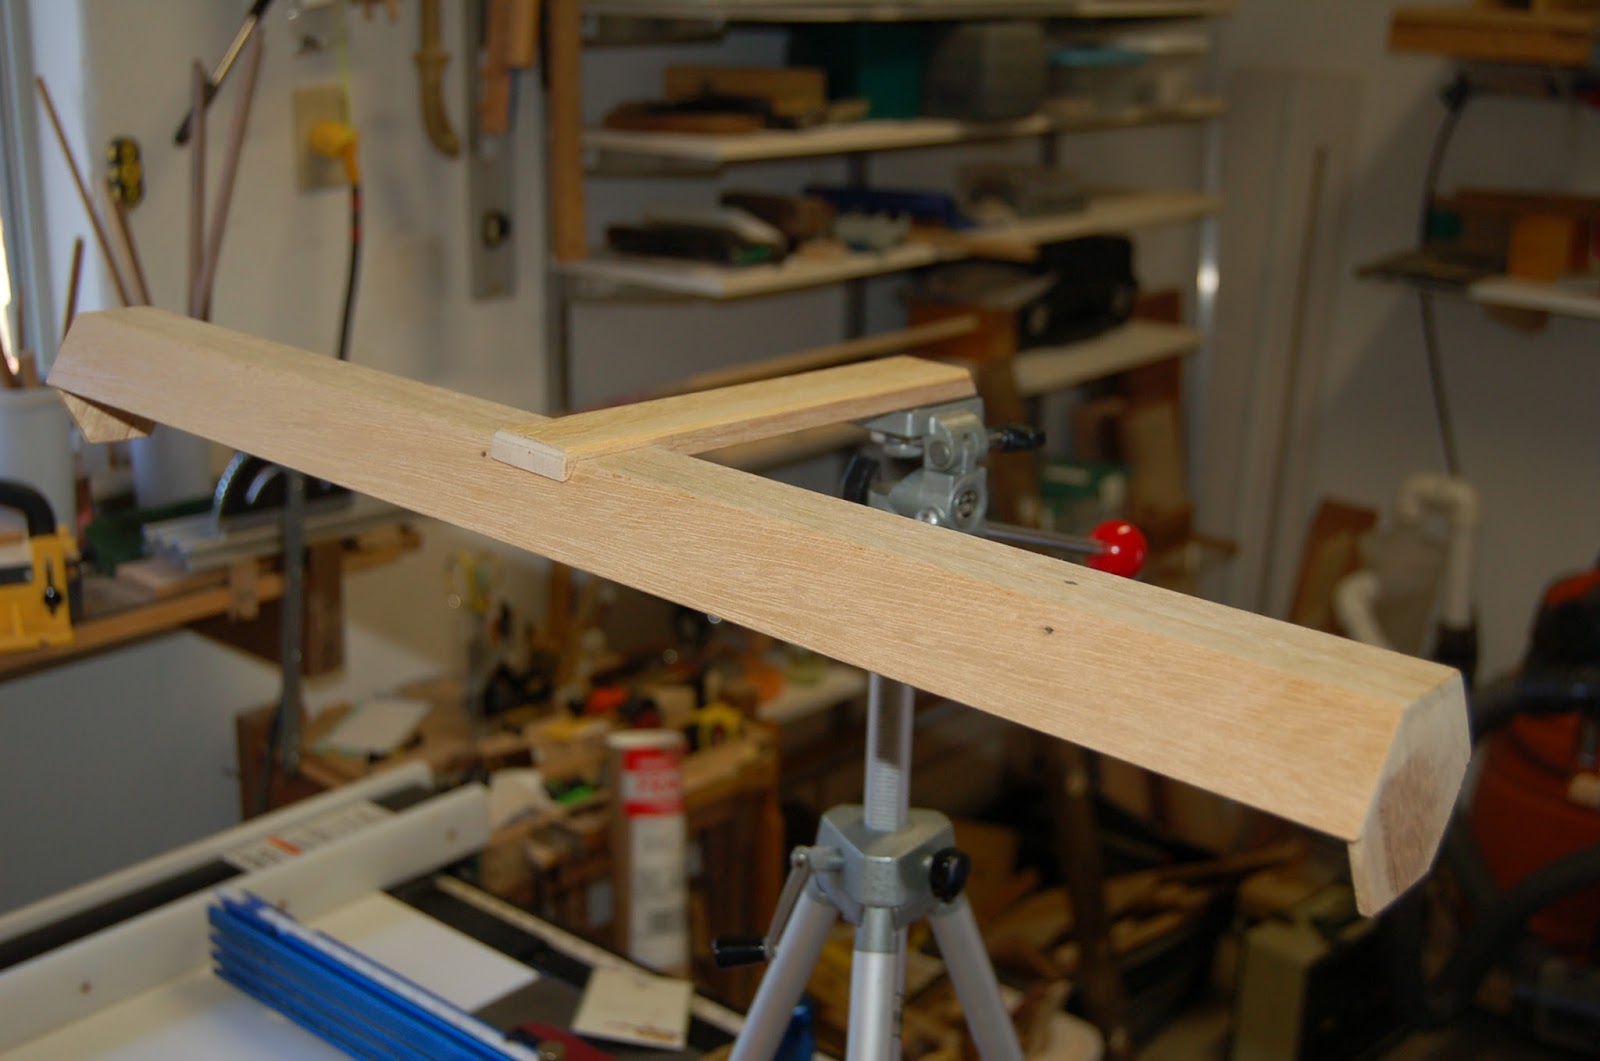
I ripped a few thin strips of the material and, with the saw blade tilted to 60 degrees, made several pieces to make a hexagonal box. Although only three sides were needed (and glued) six pieces make the glue up process easier.


A hexagonal end cap strengthens the structure.


It is all glue so clamping looks complicated but it is really not.

The fixture is made up of just two parts - the lamp holder and the cross bridge that will attach to the tripod.  A 60 degree notch will ensure a good attachment between the lamp holder and the cross bridge.


A 1/4 inch washer is needed to attach the "bridge" to the tripod. It has to be recessed and the only best way to do it is to hand-cut the square hole with a chisel.


A 2-part epoxy will secure the washer to the square hole.
The next photos show how it will attach to the tripod.


The cross bridge is attached with glue to the lamp holder.

One coat of golden oak stain followed by three coats of polyurethane finishes the wooden parts.
The light bulb holder is held by a clasp (came with the ordered item) fastened to the inside of the lamp holder.


I try, as in most of my projects, to use the minimum amount of material for each project. Hardly would I add anything that does not add to the strength or functionality of the item. I like ornate decorations too but in my minimalist world if it does not contribute to the structure it is not necessary.


An otherwise dark corner becomes a brightly lighted nook for plants. This project can easily be a desk lamp; in fact, earlier I had used another camera tripod to fashion an LED desk lamp.  Click the link below for that project:

http://easywoodworking-tolerba.blogspot.com/2015/10/led-desk-lamp-30.html

Tuesday, September 20, 2016

Scrap Wood Projects 2


The scrap heap can be a good resource for small projects so I keep some, perhaps as much as the same amount I throw away. Hard wood cutoffs, some even exotic ones, ought to be kept - most of them anyway - because there will always be small projects to do. However, there is also a place for softer woods to serve as test pieces and/or as support interior parts (wedges, braces, etc.).


These small stands are an attractive addition to non-draining glass planters. I am a proponent of indoor plants and I will discuss that in more details at the end of this blog.

 I picked a few oak cut offs, shown above.


Gluing up a few pieces will provide a wide enough work piece to make the circular base.

No matter how small the project, scrap wood or not, it should be done with the same care, patience and the utmost amount of diligence. If one is going to spend the time to do a project, one should do it like it is worth doing; otherwise, it will just be a waste of time.


For a strong joinery, I needed to make three slots around the perimeter of the circle that will match the slots in each of the leg supports. ALWAYS use clamps when working small work pieces on the table saw for accuracy and more importantly for safety.

 It is always a good idea to dry fit the pieces before final shaping.
 A quick pass with a small round over bit at the router table eases the edges of the parts.

 Band clamps are ideal for circular joinery.  Glue was applied to both mating pieces before clamping.  I used golden oak stain, and after a 24-hour drying-up period I followed it with two coats of rub-on polyurethane (below).


Now, for my passionate endorsement of the importance of indoor plants.  First of all, indoor plants do not need to take up a lot of space (shown above is a footprint of 21 X 26 inches); unlike indoor pets they stay in one place where their movements are barely perceptible; they do not demand constant attention and do not need to be fed very much; and I read plants are the ultimate indoor air cleaners.  They not only gobble up carbon dioxide that we exhale, they also take in other airborne chemical contaminants.  And, after stripping the CO 2 of the carbon, they exhale pure oxygen!  

But here is the thing. A good percentage of indoor plants die in the care of the well-meaning humans that harbor them.  And the biggest killer of all is OVER-WATERING!  And with it comes what annoys most folks - dripping water, staining and damaging of floor and table surfaces from excess water that goes over the drip pan.

The solution is in non-draining planters and avoid using a watering can because no matter how good we think we are at estimating we will almost always over water with it. I recommend using a measuring cup and stay with it, specially when using pots with drain holes.

For the best solution, use non-draining planters. Granted some plants may not take non-draining planters well, they are the exception.  First, do not throw away or put away into some dark cupboards or storage, any glass vases "gifted" with long stem roses, cut flowers for anniversary or Valentines, get well wishes, etc.  They are perfect non-draining planters because one can actually see how much water collects at the bottom.

Here is how to do it properly. Put a layer of 1-2 inches of small stones at the bottom before pouring the soil.  Once the plant is put in, measure the amount of water, one cup at a time, that ultimately settle at the bottom.  It should be just barely above the stones but touching the bottom of the soil.  Maintain that level, checking once weekly.  The soil will act like a wick, and water evaporates upwards anyway.  Meanwhile, as the plant continues to grow its roots will seek the water level downwards.  I've done all the experimentation so I know it works.  A glass planter is elegant and the small project makes it even more so.  Photos below show examples of non-draining plastic planters.


Last word: More and more people are spending time indoors as more retirees are living longer and their population is growing.  As winter comes around the corner even more people will spend more time indoors.  As for people who are actively outside their homes for most of the day to work or for other activities, it still remains a fact that we still spend a third of our lives sleeping at home including time spent watching TV, preparing and consuming meals, etc. While it is estimated that it would take a lot of plants to totally provide all our oxygen requirement if we are totally cut off from outside air, every single indoor plant will contribute in some small measure and increases considerably with every plant added. NASA research focuses on taking plants on future space travel as one meaningful way to provide astronauts with breathable oxygen recycled over and over throughout the duration of travel.  The featured "spider" plant (second from the top photos) is supposedly a species considered for space because of its efficient ability to recycle CO 2 to oxygen.