Welcome to Woodworks Made Easy

Practice any art, however well or badly, not to get money and fame, but to find out what's inside you.
--- Kurt Vonnegut

Pictures are meant to be self explanatory, and for visual clarity you may
click on each photo to enlarge. For older projects see Blog Archive. I don't specialize on a particular genre so there is quite a variety of projects for a number of different interests.

Even if you are not a woodworker but you like some or all of the projects, have your local crafts person make them for you from the ideas and photos you see here. For a particular project just click the specific title on the Blog Archive list (right side column below).

For anyone willing to learn or begin to do woodworking for the first time, please read first from the Blog Archive, "How and Where to Begin a Woodworking Hobby.

And it is not for men only. Read my note on "Women in Woodworking" from Blog Archive, April 2010.


click on each photo to enlarge


Friday, August 25, 2023

Little Jig for Small Projects

 Repurposing a coffee jar, create a little jig, and on with a project.

It started with a left over 1/4 inch thick acrylic. Ripping it to 5 inch width.


A small table saw sled  made quick work on cutting the acrylic to size.

Making this jig was fun but, as sometimes the case, as soon as I finished it I realized there was one other little improvement I can do.  That will be in another blog if I decided to make it.  Perhaps I can explain a little more in detail how this thing works in its entirety. My full-size sleds are on sabbatical now that this little one takes over.  For small projects, anyway.
Featured in previous blogs, a kerf maker tool makes accurate grooves without measuring. Here I'm using a commercial miter bar with an innovative flip stop.  The stop slides along the track and set with a set screw.


Here is a close up (below) of that miter bar, made by Woodpeckers. The stops flip out of the way while keeping their positions for repeatable cuts. The stop can be micro-adjusted when necessary without loosening the set screw.


Flattening the edge with a jack plane is quick.


Ripping the work pieces to width.

Cutting to length on the sled is safe and repeatably accurate.

This is where the sled makes accurate tapered cuts on small work pieces safely.


Easing the edges of the cut acrylic with the sharpening jig

 Acrylic is stable and rigid in small dimensions as with this project and it is a great complement to wood for small pieces like these.

CA glue and accelerator makes for quick joinery of acrylic to wood.


The illusion of floating in mid-air


Non-draining planters featured in earlier projects have become my favorite because they use very little water, creating no spills and plants seem to be okay with it.


Tapered stand used a little differently.


Sunday, April 16, 2023

Not Your Kitchen's Common Cleaver

A friend,  a high school classmate of mine, went back to visit the old country three months ago.  He brought back these three "monster" high-carbon steel blades. These blades were fashioned from what used to be automotive suspension leaf springs by a local blacksmith on the island. For now they are ugly ducklings that I will try to turn  into something a bit more pleasing to the eyes, though perhaps not to the same degree as the eye-catching cleavers advertised in home & garden magazines or fancy catalogues.

This friend is an avid hunter and he wanted something substantial to use after a successful deer hunt for the subsequent  obligatory vivisection and subdivision  of the whole carcass into Ziploc sizes for the freezer. He wanted one with heft and cleaving power a butcher will be proud of. So, the deal is that I will fashion the handles for these beasts, and I get to keep one and he will have two.  A fair deal, considering he had these brought from half away across the world (in his check-in luggage, for those who might wonder). {More importantly, I want to recognize those craftsmen from everywhere around the world, in their makeshift workshop in their backyard, using home-made furnaces and brute physical strength in recycling and fashioning something out of salvaged, rusty  high carbon steel}.


But first, a side note on why these are fashioned from leaf springs and how did such a practice originate, particularly as it was in the Pacific islands, although the idea of recycling and repurposing steel is a worldwide phenomenon, long before recycling was even part of the social conscience.

After the war, military equipment - partially destroyed, salvaged, junked, or abandoned - became an excellent source for high carbon steel to be repurposed. Drive shafts, pistons, ball bearings and spring coil and leaf springs were great sources of good quality steel. Post WWII, material shortages of cutting implements were partly solved through recycled steel.

Two decades ago I came across this 15-inch bolo at a flea market just outside of Dallas, TX. I had to have it, despite the hefty price for something at a flea market. The year 1945 was etched on it and the initials of the unknown craftsman, who also added some simple artwork of the "Philippines", coconut trees, a nipa hut, the sun rising between two mountain peaks. 1945 was the end of the Pacific war, one year before the Philippines earned its independence from the USA. I thought of the significance, so I bought it. I imagined the blade was made from a leaf spring salvaged from an army Jeep.


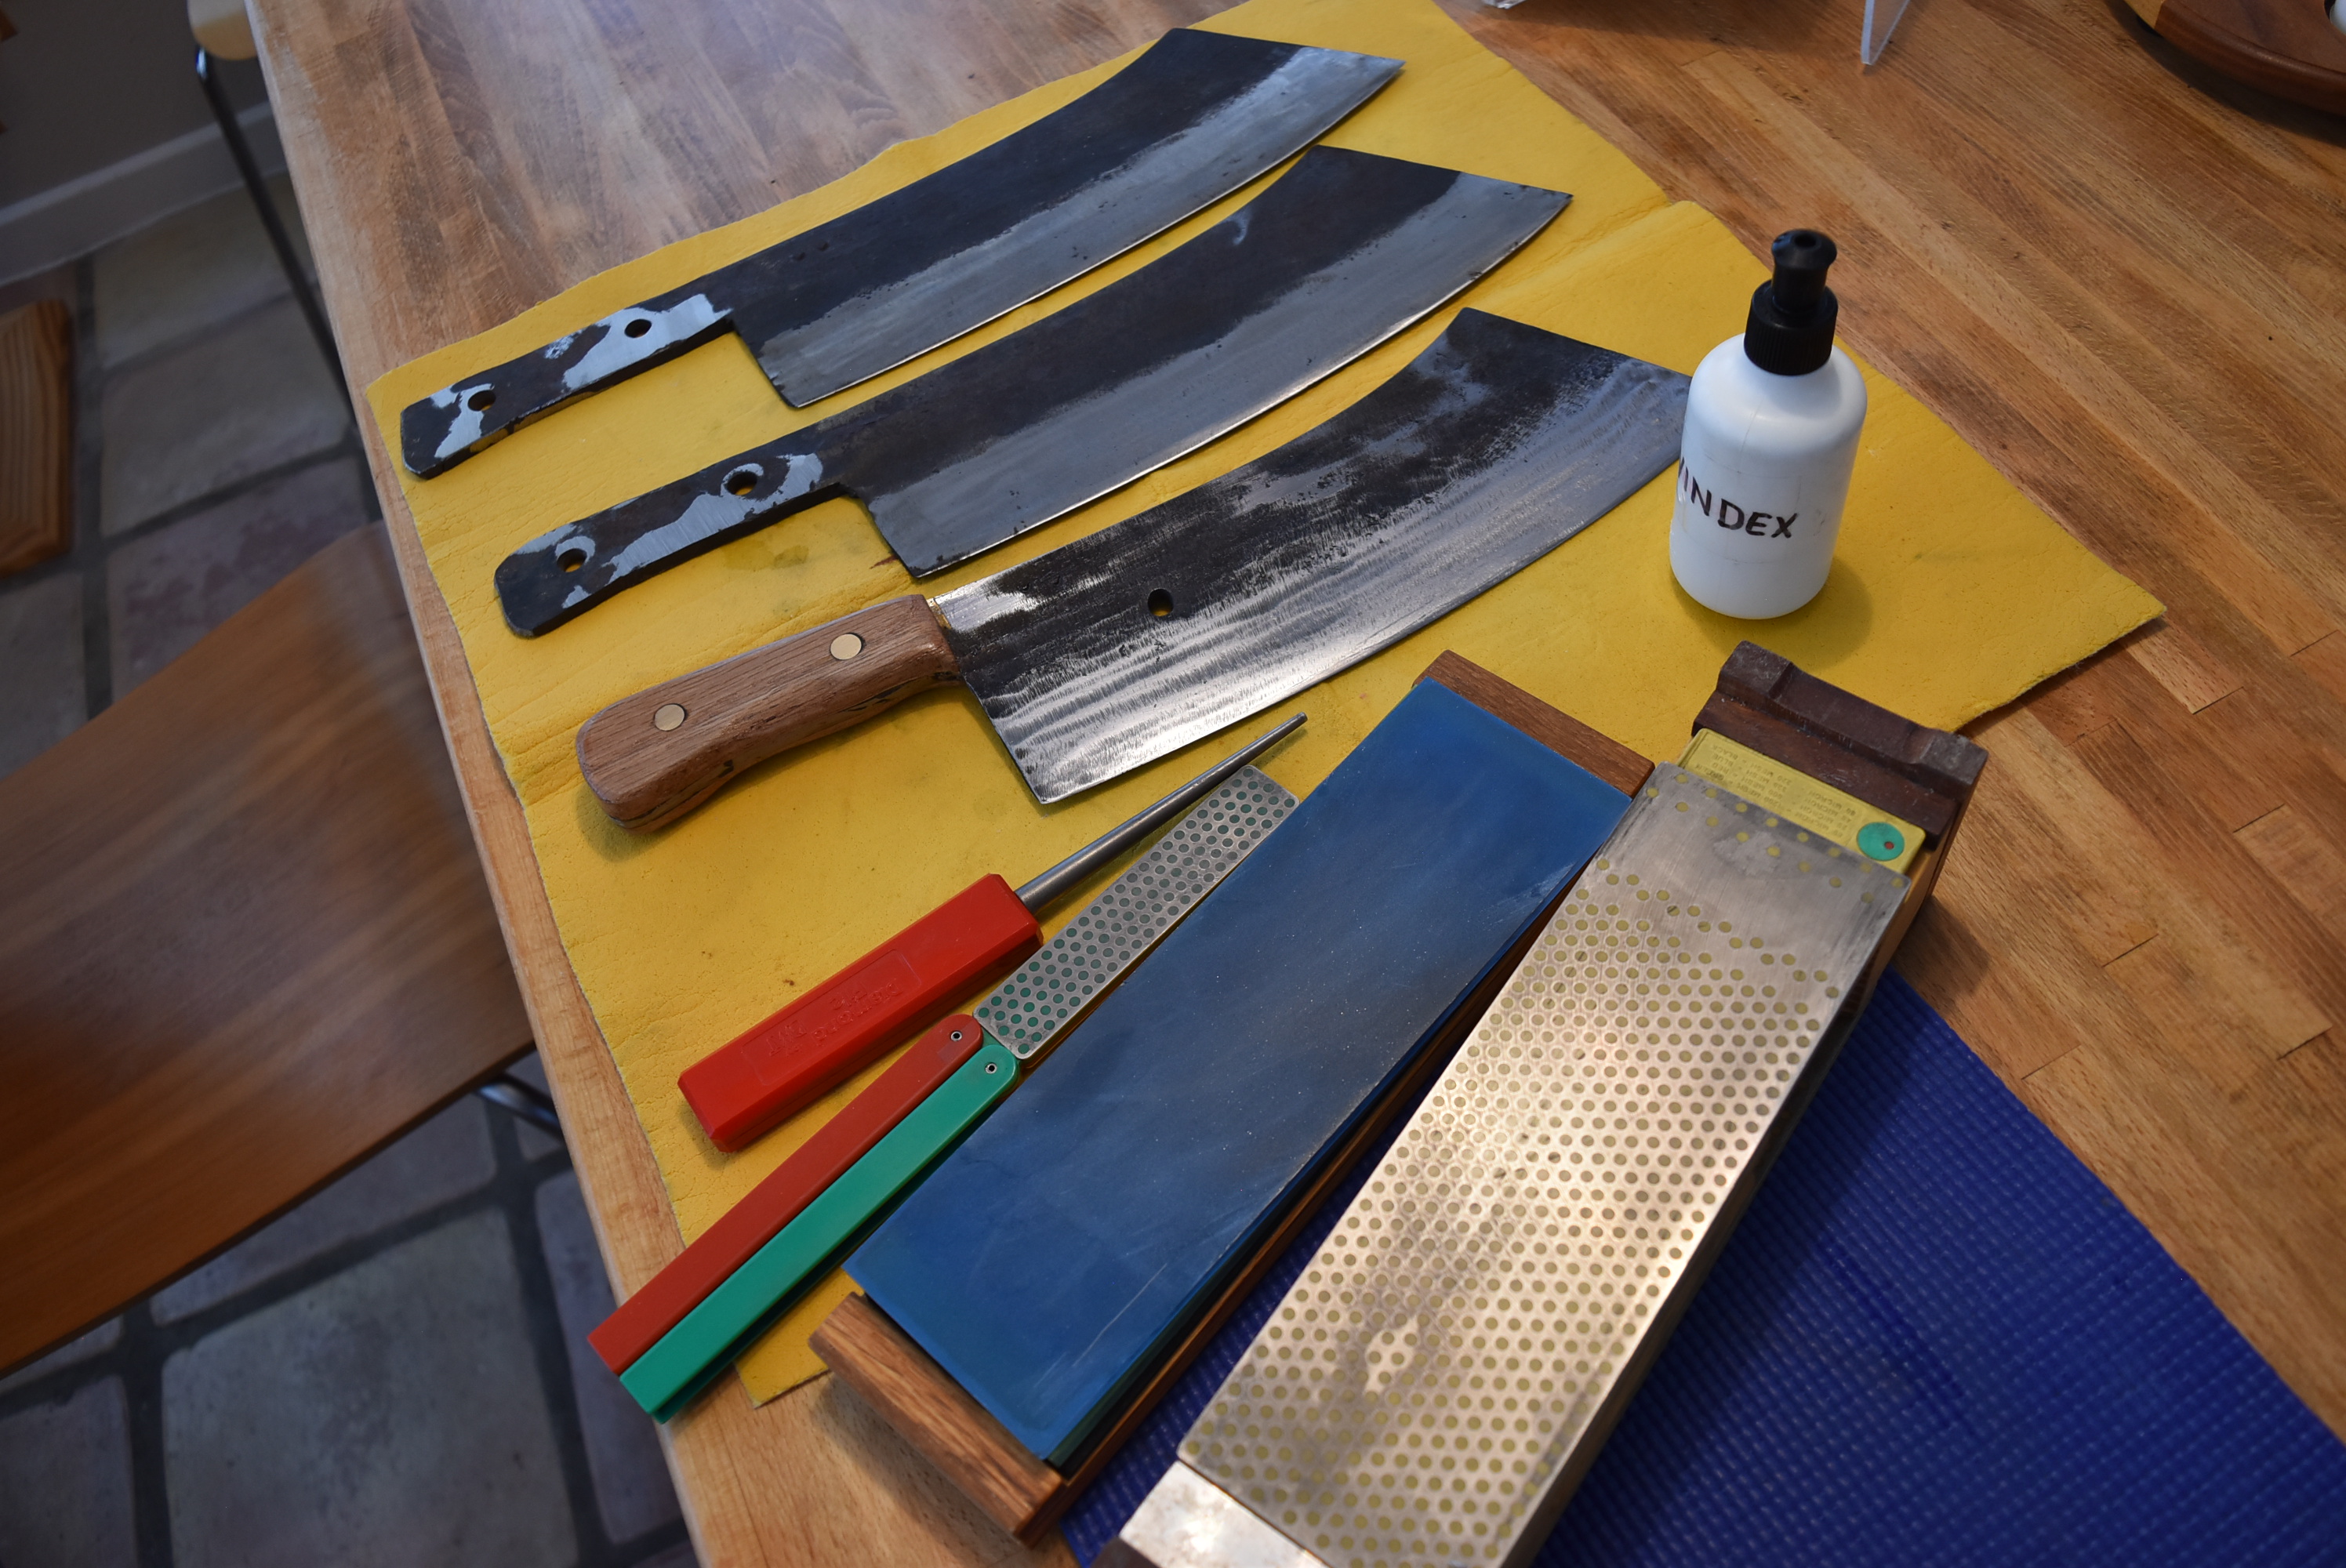
Back to these monster blades. The cutting edge is well defined but not quite properly honed. The hilt needed to be flattened for good adhesion with high strength 2-part epoxy.  A bench belt sander did the job. Re-drilled the 3/8 inch holes for the pins. Tempered steel put up a good resistance to the drill bit but it is a  good sign of the blade's hardness.


Cut to rough length the pins from a 3/8 inch brass rod.

The wooden part of the handle is called "scale". Drilled 3/8 in. holes through one scale, using the holes on the hilt as guide, then epoxied it to the hilt.  
Then worked on the opposite scale by first using double sided tape to secure the second scale before drilling the two opposite holes. 
24-hour clamping


Shaping the scales.  The pieces were part of oak boards that came from a 100 year-old barn in Mississippi.

Marked the desired shape


Best to leave the back of the blade black and rough.  A grinder could have cleaned it up but there is risk of thinning the blade.  Besides, the way it looks maintains the beastly character of the cleaver.

After honing with diamond stones, it is sharp enough to make some fine slices although this is not what it is designed for.  The thick blade is indeed for real tough work on venison and cutting through bones.


One down, two more to go!


Note: Proper maintenance of high carbon steel knives is to wipe it thoroughly dry after each use to prevent rust, which will develop quickly on any wet iron. Wiping cooking oil when storing blade is good practice.


Thursday, February 9, 2023

The Other Method of Hanging an Orchid Indoor

As always, with most hobbyists, we learn immediately after finishing a project, another method of doing something.  Whether it is one or two more steps or one completely different way, we find that there is a better way, or at the very least, just merely a different way.  That's what makes hobbies interesting, if not only less boring.  And it can go either way in terms of complexity.  One may simplify a method, or make it more complicated.  And then I tried another use for baking soda - in the glue up process.  Baking soda, like vinegar, continues to be one household item that is always looking for another way to be useful.

First, for the "ears" I found some left over polycarbonate.  Its white color matches with the ceramic container.  As with the previous project I drilled three equidistant holes around the rim and fastened the "ears" like so, below. 


I used the baking soda powder as filler between the gap before smearing  drops of the CA glue (crazy glue) at the joints.  I sprayed an accelerator to instantly harden the glued joints.

Another simplified step in the process was to merely drill holes at both ends of the clear 1/4 inch polycarbonate rod.  Two ordinary key rings completed both ends for hooks to connect to.


Tiny holes drilled on each of the three "ears" provide a way to thread the strings that are secured with tiny rings that act as stoppers.  The two following photos best explain how they work.


The second orchid to the right (first project) had already lost its bloom. But there is hope it will continue to grow.  The sellers of orchids finally let out the secret to watering.  These orchids came with a watering cup.  The grower recommends two of these once a week. It is actually the equivalent to the volume of water in one standard kitchen measuring cup.

 
Hobby Lobby and online retailers, including Wal-Mart, sell CA and accelerators.  BSI - the brand I've been using - sell both as a pack. And don't forget the humble baking soda, if you need it as a filler.  I've red that Styrofoam - crushed or shredded to fine particles work just as well.


Saturday, February 4, 2023

Tea Kettle Stand

I only occasionally drink tea. And when I did it was always from out of tea bags.

It had been cold, rainy during the last days of January. I was going through the cupboards and saw several special tea given to us by friends from Taiwan and Vietnam not too long ago that we've not gotten around to try. So, I rummage through the lower cabinets to find a tea kettle. A gift from long ago that just sat there in the dark corner.

Cold to do anything outside, hardwood scraps lying around, pieces of stuff waiting to be re-purposed, I went to work.

Cut and glued two thin pieces of oak. Two small wooden cones left over from another project.


Made a circle out of a square


From an earlier project five years ago that was waiting to be re-purposed

A planter stand it used to be will have another use.

Cutting the tips of the cones to precise heights was a challenge that took a while to figure out. Aha! I drilled two 3/8 inch holes into a scrap board. Using a level ensured that the two cones will be cut precisely.

With CA glue and accelerator I fastened the two cones, then cut with a flushing saw. 

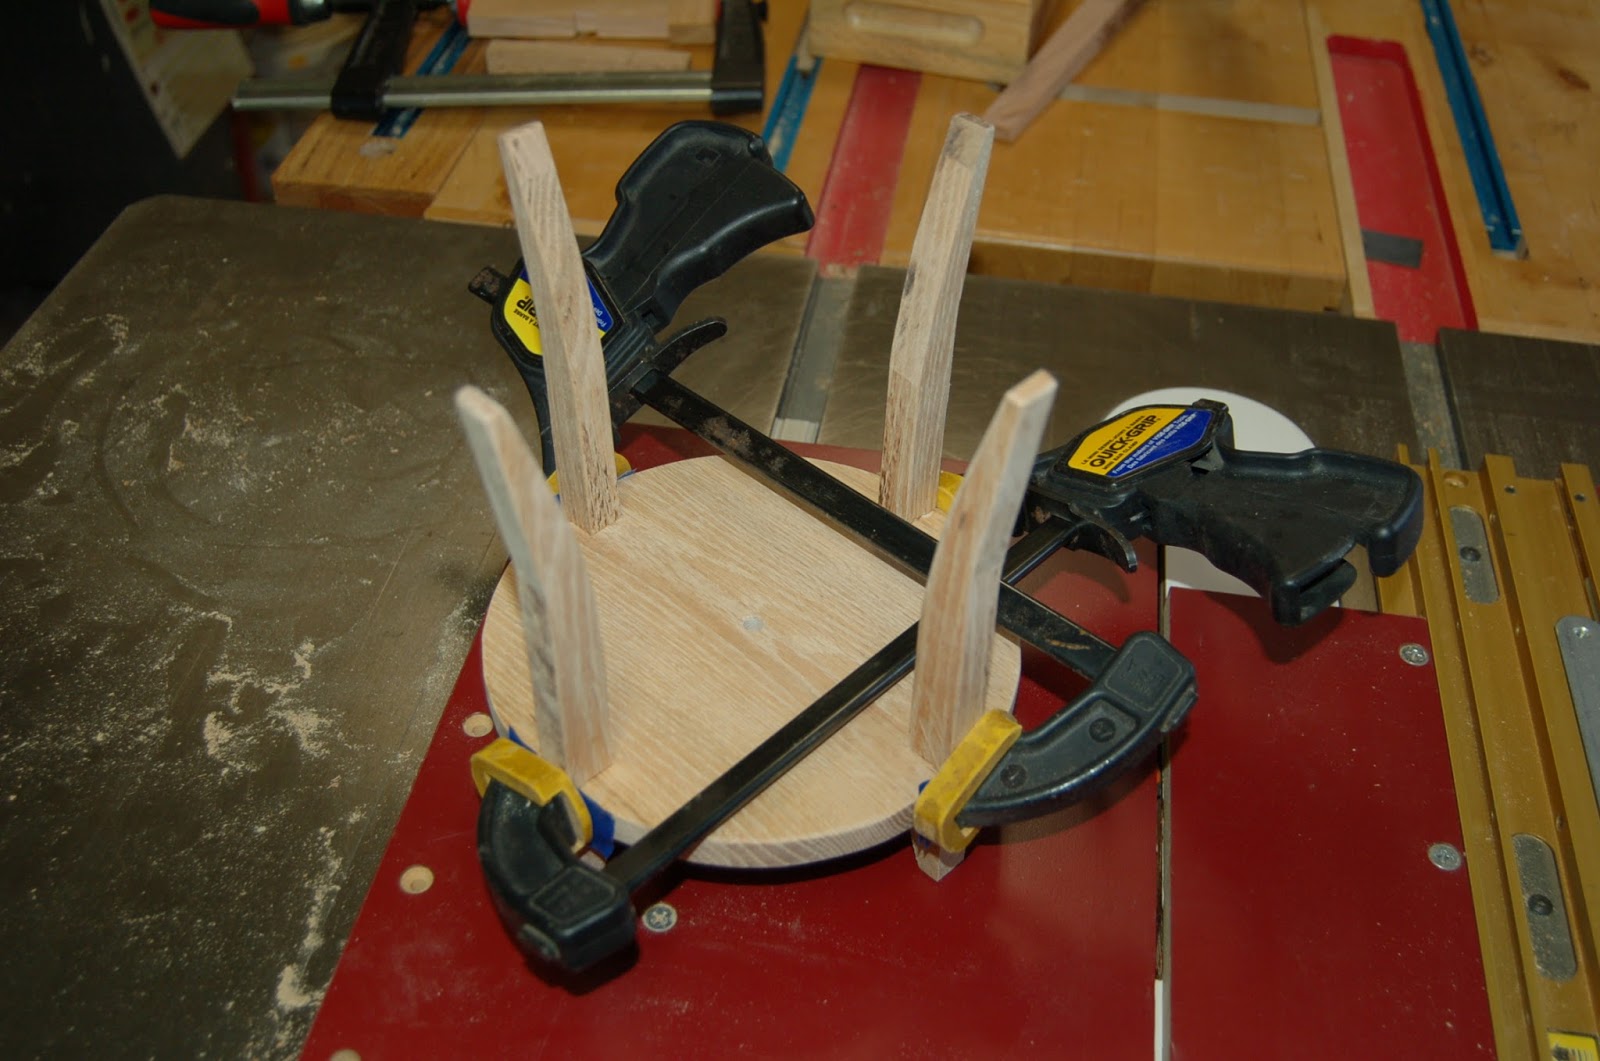
Below shows the method to the madness.  A spacer circle ensures the desired height for the two conjoined cones.

More detailed method to the madness

The mini round table is what will support the tea kettle ..

.. which makes it look like the outstretched four arms are supporting it.


I cannot help but to call a tea strainer a steeping tool; a weak attempt at a sort of word play on the stepping stool. Corny humor aside, this stainless contraption will strain tea effectively.


Keeping the tea kettle in full view by the counter top will help to make me a regular tea consumer. However, I may not develop the taste to add milk to it, as those from across the pond and in all its past colonies will have us believe is the greatest thing for tea.  I think that idea was lost on that fateful morning on December 16, 1773 along with all the 342 crates of tea that went into the bottom of the Boston harbor.  Just teasing, my British friends 😇 I believe milk-free tea is only true in the U.S. and a few other non-conformist countries.