This is the last of a series of three, unless Hock Tools make another model of their high carbon steel knife kits. This is the 8 inch chef's knife. Two years ago (Oct. 2015) I did the 5 inch chef's and the paring knife. Hock Tools' main product line are edged tools for woodworking, i.e. hand plane and spoke shave knives, marking tools, etc. They sell the high carbon steel knives (these are forged in France by special arrangement) which are available as kits for hobbyist woodworkers to apply their creativity and choice of wood species in fashioning handles for the blades. Two years ago I kept left over material for later, with the intention of buying the 8 inch blade. Took a while because: (a) there were other projects; (b) the blades are not cheap. But these are among the best in the market and uniquely different from the more popular stainless steel blades. High carbon steel knives may not be for everybody. Unlike stainless steel, high carbon will rust! And it will stain as to develop a grayish patina over time. So, it must always be kept dry after each use.
However, high carbon high quality steel knives are the very best in many ways. It not only has the sharpest edge, it will maintain it longer, yet it is easy to sharpen and hone. There are folks, I am one of them, who actually love the patina that develops with high carbon steel - because before stainless steel, quality old world knives were solely made from high carbon steel that, when taken car of, easily become heirlooms for generations that follow..
With a coping saw, or a scroll saw or band saw, cut outside the traced line to make sure there is enough "overhang" so the handle can be made flush with the blade handle during finishing.
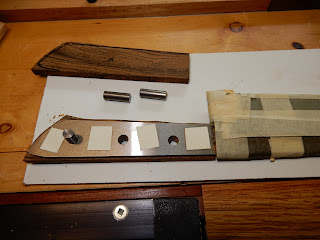
I used a good double sided tape to secure one of the scales to one side of the tang (handle). Using the holes on the tang as guide, drill three holes. Flip the handle over, tape the second scale, insert two pins temporarily and drill one hole, move one pin to it and drill the other hole and on to the third one. This insures a perfect match during final glue up.
Set the knife aside after removing the scales. Insert all three pins and shape the forward edge (shown as the narrower part of the handle closest to the entire blade). You need to do this because you will not be able to shape this later without scratching or damaging the blade.
Use a high quality 2-part epoxy to glue the two scales. Make sure to clean the tang and pins with alcohol to remove any oils or other contaminants. Lightly rub the metal surface and pins with 320 sand paper. Insert the pins one one scale first, apply epoxy and press one side of the tang. Apply epoxy on the remaining side of the tang. Position the other scale, using the pins as guides, and press down. Apply clamps.
Let the glue dry overnight.
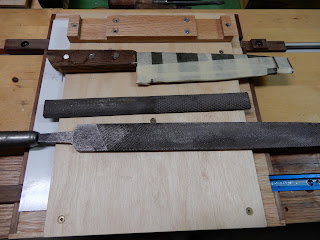
Aside from rasps and sand paper, a stationary belt sander will make quick work of removing protruding portions of the pins. Do this slowly until the pins are flush with the scale surface.
Next order of business is to make a stand for the blade such as the ones for the two other knives. It is another project.


No comments:
Post a Comment