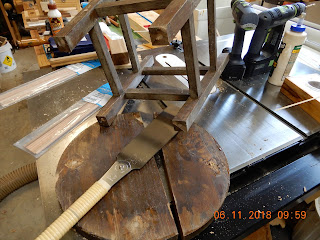
My friend's 100 year old dad who still enjoys puttering around his vegetable garden has a favorite wooden stool that broke apart at the top (first photo below). His dad is one of the few remaining members of the greatest generation who served in WWII (Pacific), so the least we can do is tend to his wish to have this stool restored. Though a new one can easily be bought to replace it, that was not an option his dad would consider. This broken one had to be fixed. Well, if that is how much it means to him, then we have an obligation to heed the request.
 |
| Drilled 1/4 inch holes for dowels to reinforce the leg and rail joints at every intersection. I hit a couple of nails that were obviously used in the original construction so I took care to avoid them. |
 |
| After the glue on the reinforced joints dried the leg assembly were cut away so the top can be fixed. |
 |
| Biscuits are my favorite to join two edges of a workpiece as shown. Biscuit joinery tool (in yellow) was used to cut the slots (from both edges) for the biscuits. |
 |
| Glue and strong clamps kept the two pieces tight until the glue dries. |
 |
| The top broke when a section of it warped upwards and separated from one of the leg tops. The separation was 3/16 of an inch. |
 |
| Adding a 3/16 inch spacer is not only an easier option it actually prevents stress on the top had I decided to force it back down with a screw. |
 |
| Spacer is glued and later cut to the dimension of the leg's cross section |
 |
| Drilled small pilot holes to locate where to drill later for screws to go through during re-assembly |
 |
| The screws will be hidden by 1/2 inch plugs throught the 1/2 inch recessed hole. |
 |
| Then counter sunk. |
 |
| A slight rounding off of the top's edge. Note bigger holes were later drilled to accommodate the screw size after the 1/2 inch recess was made. |
 |
| Tip: I recommend a Japanese saw in households where nobody even does woodworking. It is a lot more versatile than the western saw. Not only will it cut more efficiently with a thin saw kerf, it will cut off the plugs like so, very cleanly and flush to the surface. |
Restoring this stool was as rewarding as it was challenging. I made sure to only make very slight changes so as to make the stool still very familiar to the owner. If I may say so this restored stool is a lot stronger than when it was originally made.


No comments:
Post a Comment