If I were to classify scopes of woodworking from the stand point of size and setting a specific genre for comparison, as in in-door planters, then I will classify them into Large, small and micro projects.
The above is a large project and although it has many separate individual parts, it has a huge center post that would take two persons to carry.
While large projects take patience, micro projects require one to do detail work, however simple the process is, because these are the ones that people would hold up close and look at with attention to the smallest detail.
The good news with micro projects is that, often, scrap wood will suffice.
These two pieces shown (above and below) only seem complicated but you'd be surprised at how simply the arch, for example, was made. When I first thought of the project I had no idea at first as to how to make the arch.
Pieces of left over wood from drawer faces in the previous project were the materials used here.
I hardly show dimensions in my blog because I leave it to my readers to use the techniques to their specific needs or make modifications of their own and not be restricted by set measurements.
1. Cut two identical squares
2. Bevel two opposing sides of the squares to 45 deg.
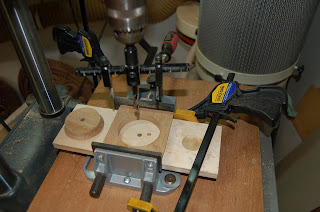
3. Cut a circle in each square
4. Split both squares exactly in half.
5. A shallow rabbet cut on the edges opposite the arch will form the "lips". Join and glue the four pieces with the arches down. Tip: I kept the cut off pieces when the bevels were made. I cut short pieces and glued them to the inside corners to strengthen the joinery.
Checking for fit before clamp-banding.
The glass vases (which were originally for Anniversary/Valentine, etc. cut flowers) are already attractive vessels for non-draining planters. The micro projects merely enhance their looks akin to settings supporting a gem stone on a piece of jewelry.
Above is an example of several micro projects done over a period of time. Bunched together now as a cluster of hexagonal planters it has become a small project. As time allowed I made one or two of the hexagons at a time (check blog archive on "hexagonal planters") but sticking to a consistent dimension for a particular size non-draining pot. The compact cluster of plants under a grow light fixture occupies a corner of a mere footprint 28 X 28 inches square.


No comments:
Post a Comment